Creating new inductions
To start creating new inductions click on ‘Site Inductions’ right under your ‘Dashboard’. Now let’s locate and click a button to your right hand side called ‘Create Induction Course’.
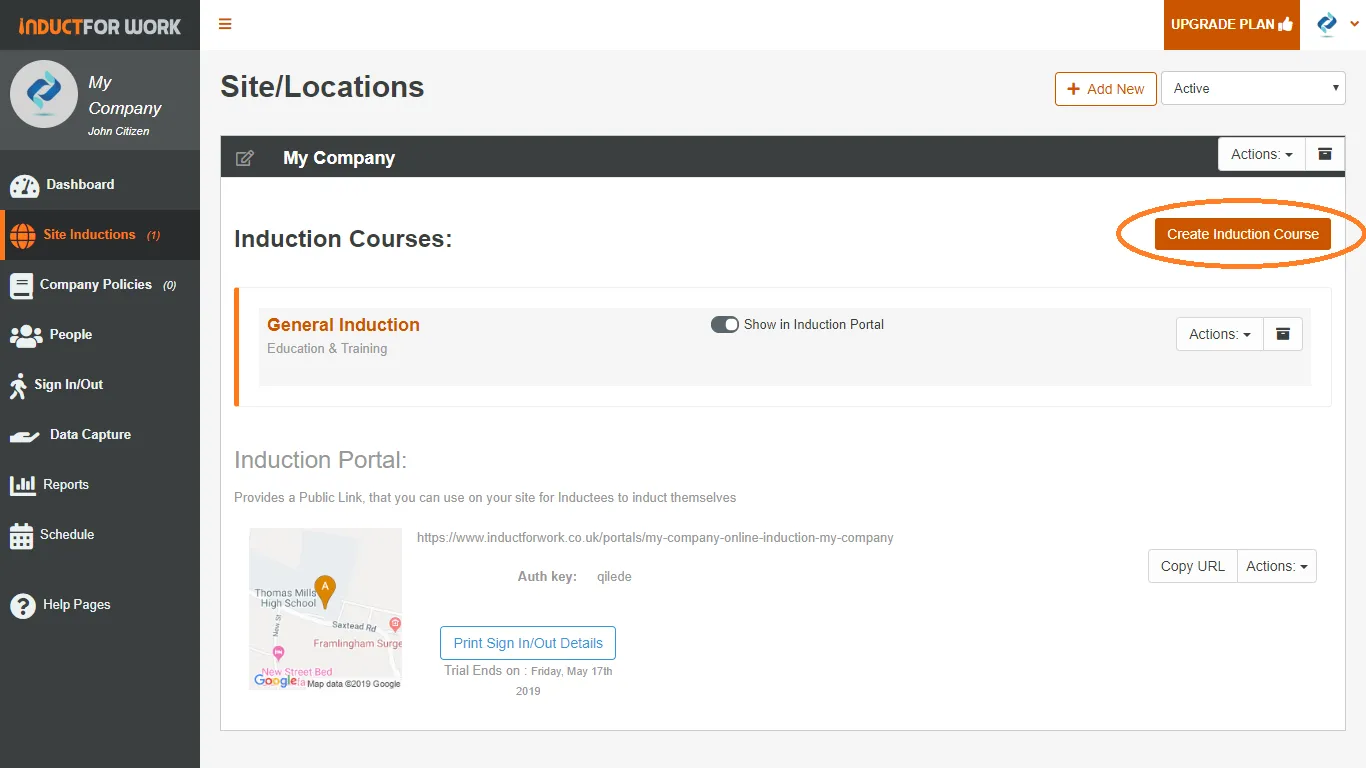
Now you can either select to create a blank document or start from a list of available samples.

If you build your new induction from scratch: type in induction name, select your industry and click on ‘Create’.

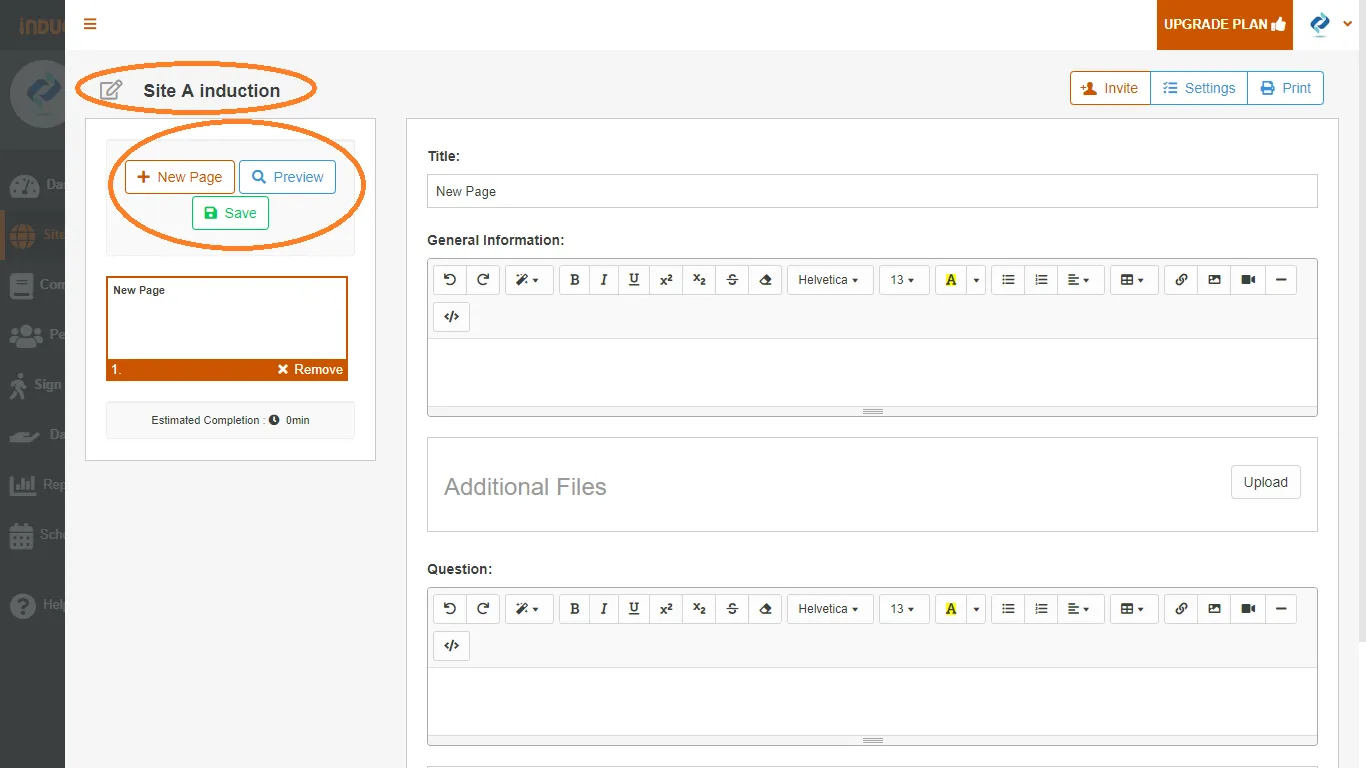
Now you’ve just created your own induction. Area up here shows the name of your induction, which can be updated and changed at anytime by clicking on this pencil image.
‘New Page’ button creates a new slide and you can have as many slides as you require in your induction course.
‘Preview’ button lets you see how this induction may be viewed by your inductees.
‘Save’ button saves the content.
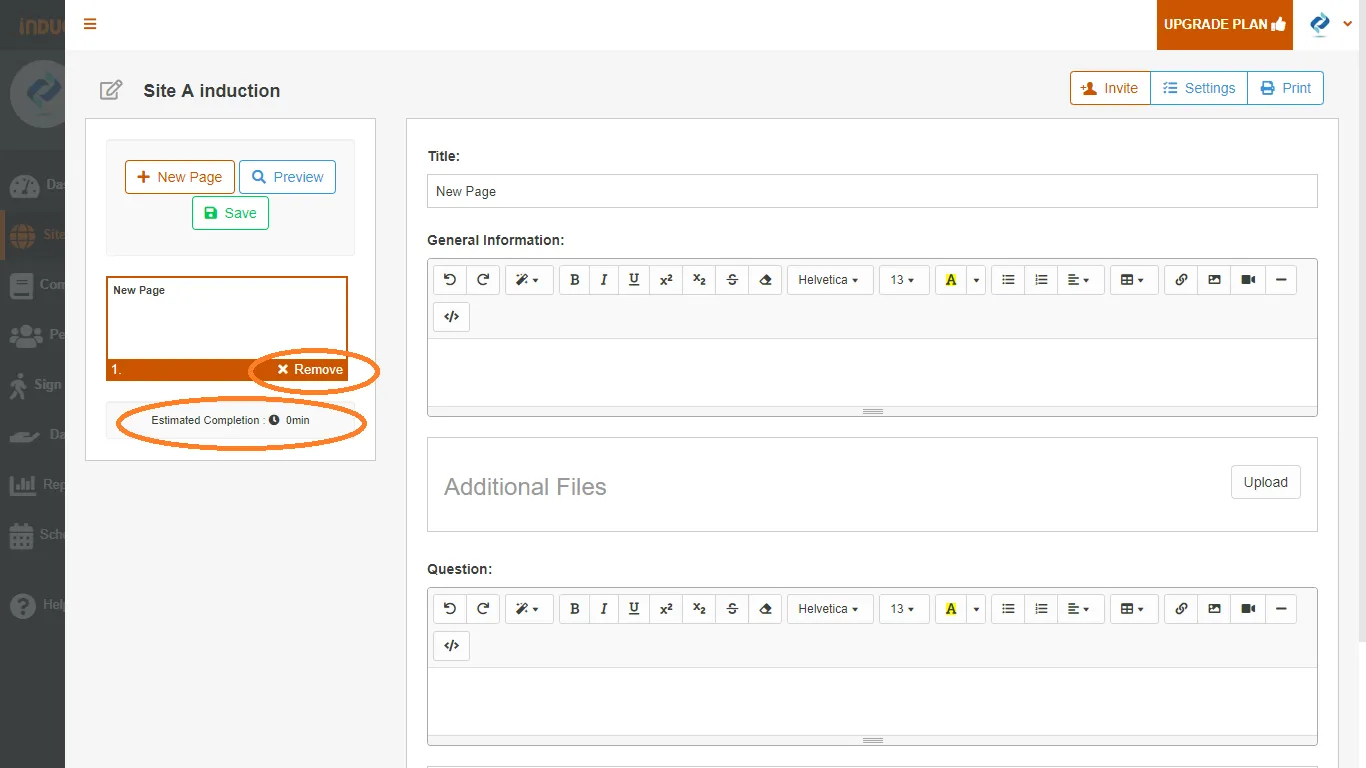
If you need to remove any slides, please click on ‘Remove’ area for that slide and confirm this action.
If you need to remove any slides from your induction click on ‘Remove’ area for that slide and confirm the removal. ‘Estimated completion time’ is calculated automatically based on the amount of words in your induction. If you need to change it, it is done from induction settings area located up here between ‘Invite’ and ‘Print’ function
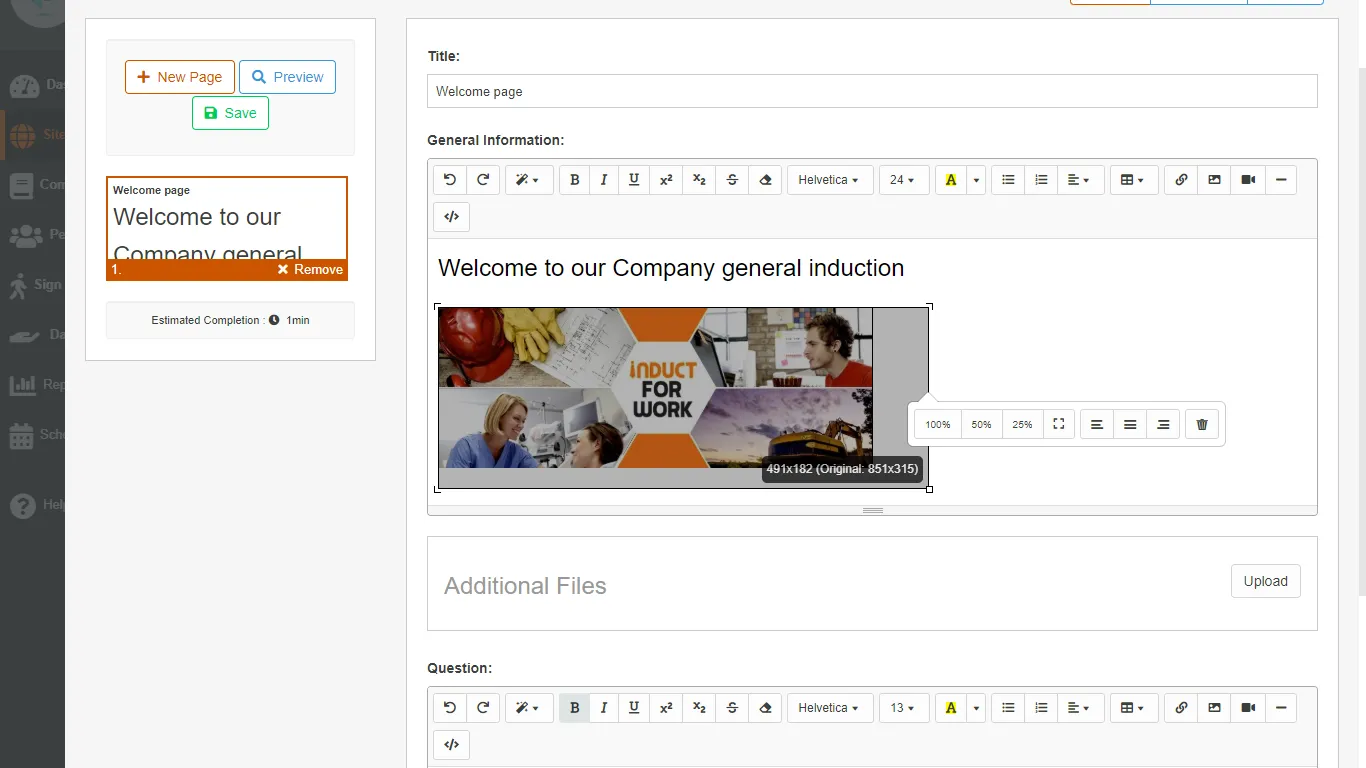
Now let’s edit this new induction and create a title for our first slide. We will call it a ‘Welcome Page’.
Now in ‘General Information’ area we can enter ‘Welcome to our Company General Induction’. We can increase text size, say to 24, and let’s attach a picture and now let’s resize it to 50%. If you need to attach any documents to this slide please do in ‘Additional Files’ area that can be found right here.
If you need to test knowledge of your inductees you can choose to setup questions and answers. Questions can appear straight under the slide you can choose to ask questions on a separate slide.
Let’s create a new slide, and let’s call it ‘Testing knowledge’. Now let’s enter our question: ‘Do you agree that you have read and understood all ‘Our Company’ Safety Procedures?’ Once the question is created we need to select answers. We can create as many answers as necessary in our online inductions but we need to make sure that at least one answer is set as a correct answer.
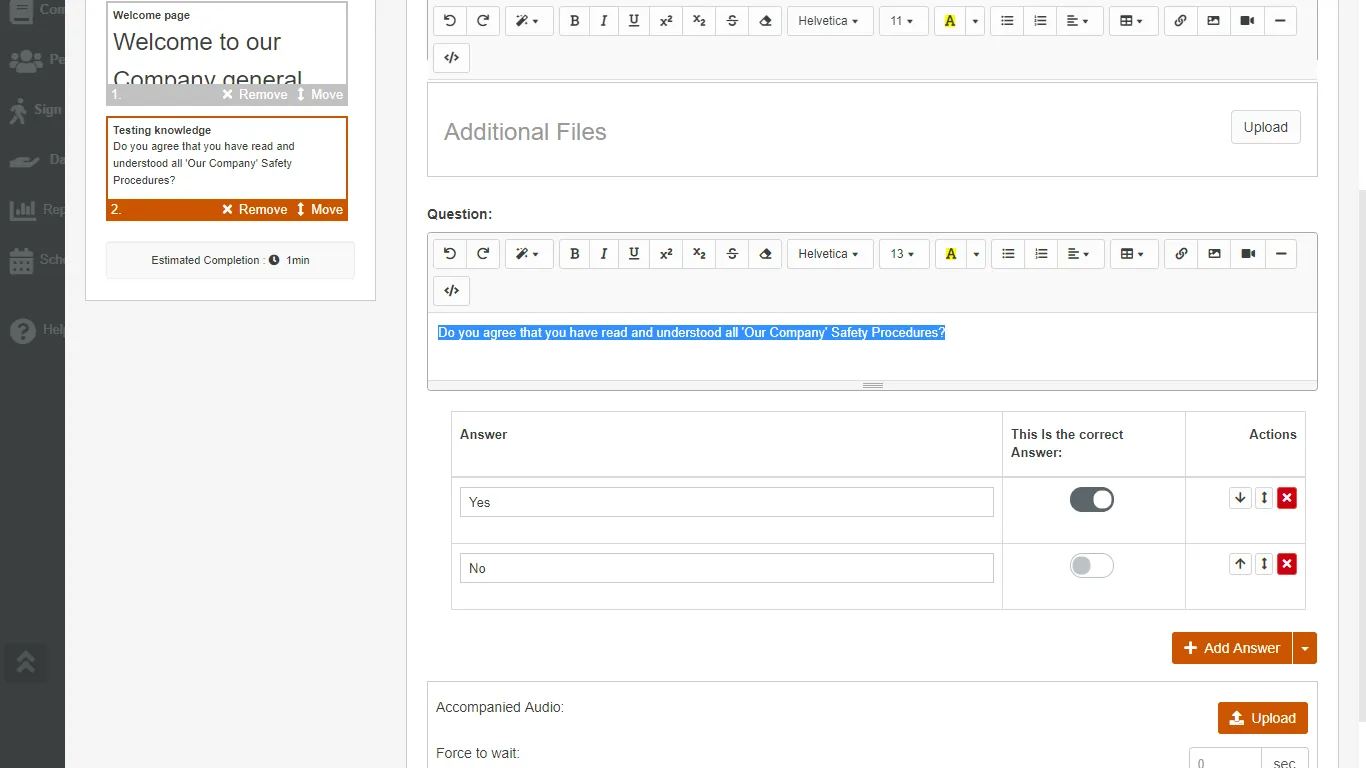
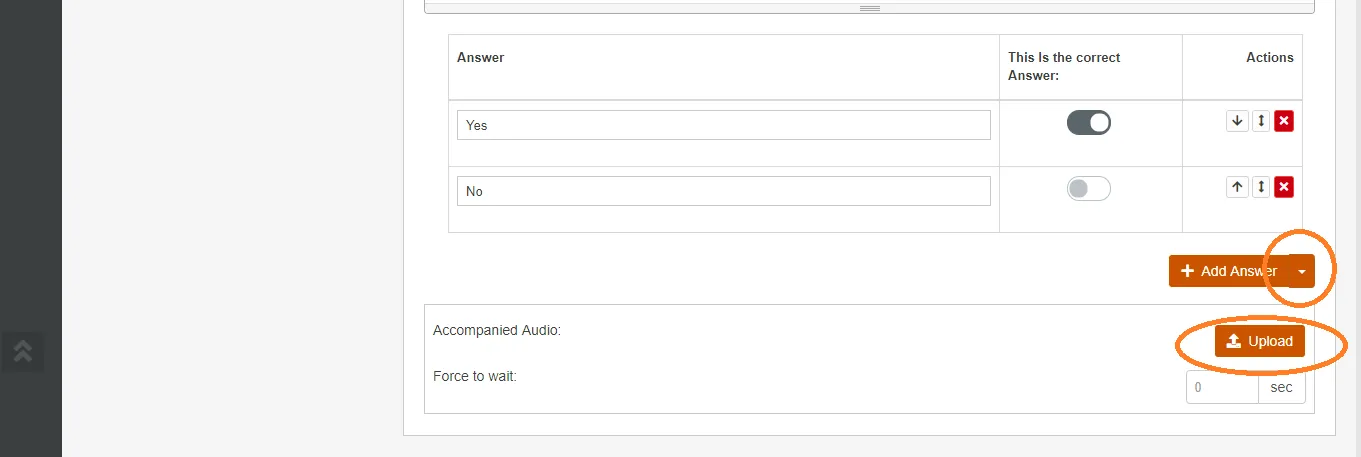
If you would like to add more answers, please click on ‘Add Answer’ button. Also there is a drop down menu next to ‘Add Answer’ button. It lets you to select whether there answer is a check box or an input box. Input boxes allow your users to write their own answers. Input box answers can not be set as right or wrong answers and they are normally being used when asking your inductees questions like: “Do you suffer from any allergies? If yes please provide details.” This answers are then attached to inductees profiles.
‘Upload’ button allows you to attach any previously recorded voice-overs to accompany this slide.
Another function you may find handy is called “Force to wait’. It allows you to lock in each slide for a number of minutes or seconds. It prevents your users from rushing through their induction slides, and prevents them from going to a next slide until that time passes.
In the next video we will cover Induction Settings. Happy inducting!
