What is Document capturing?
Now let’s have a look at how it all can be set up.
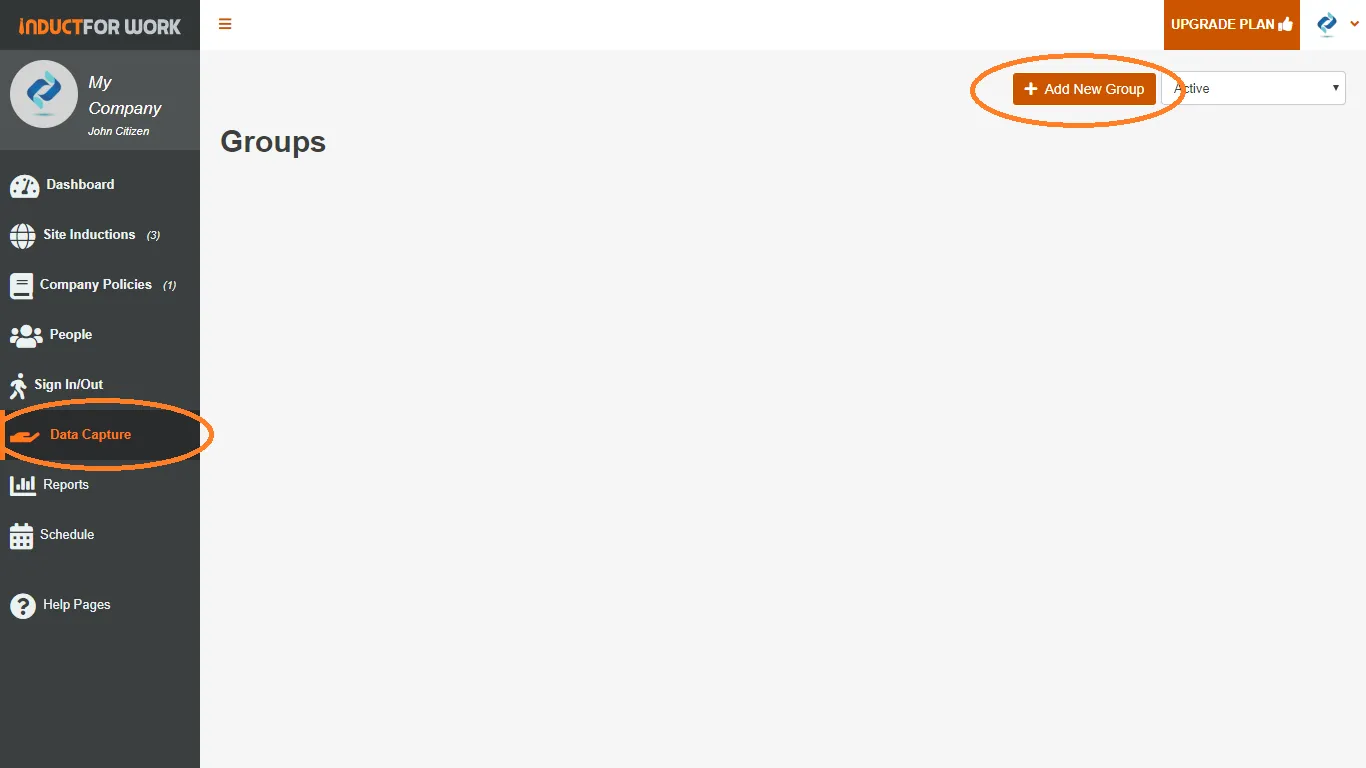
Let’s click on ‘Data Capture’.
Now we need to create a New Group of documents. To do so let’s click on ‘Add New Group’
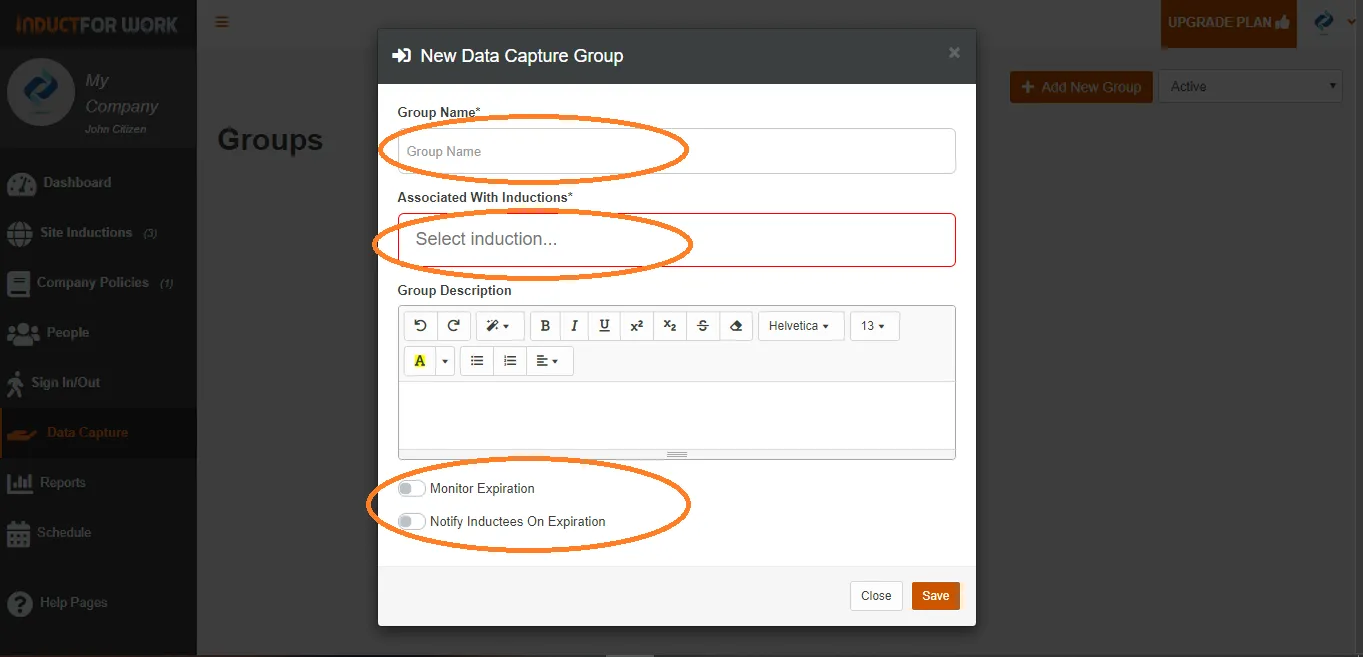
Now we need to name to our group, so it can be easily identified later, when we make any changes. Then we need to attach our document group to an induction in the area called ‘Associated with induction’.
If we look below ‘group description’ area, we will see couple of other available options:
Monitor Expiration and
Notifying Inductees on Expiration.
These Settings can be turned On and Off at anytime.
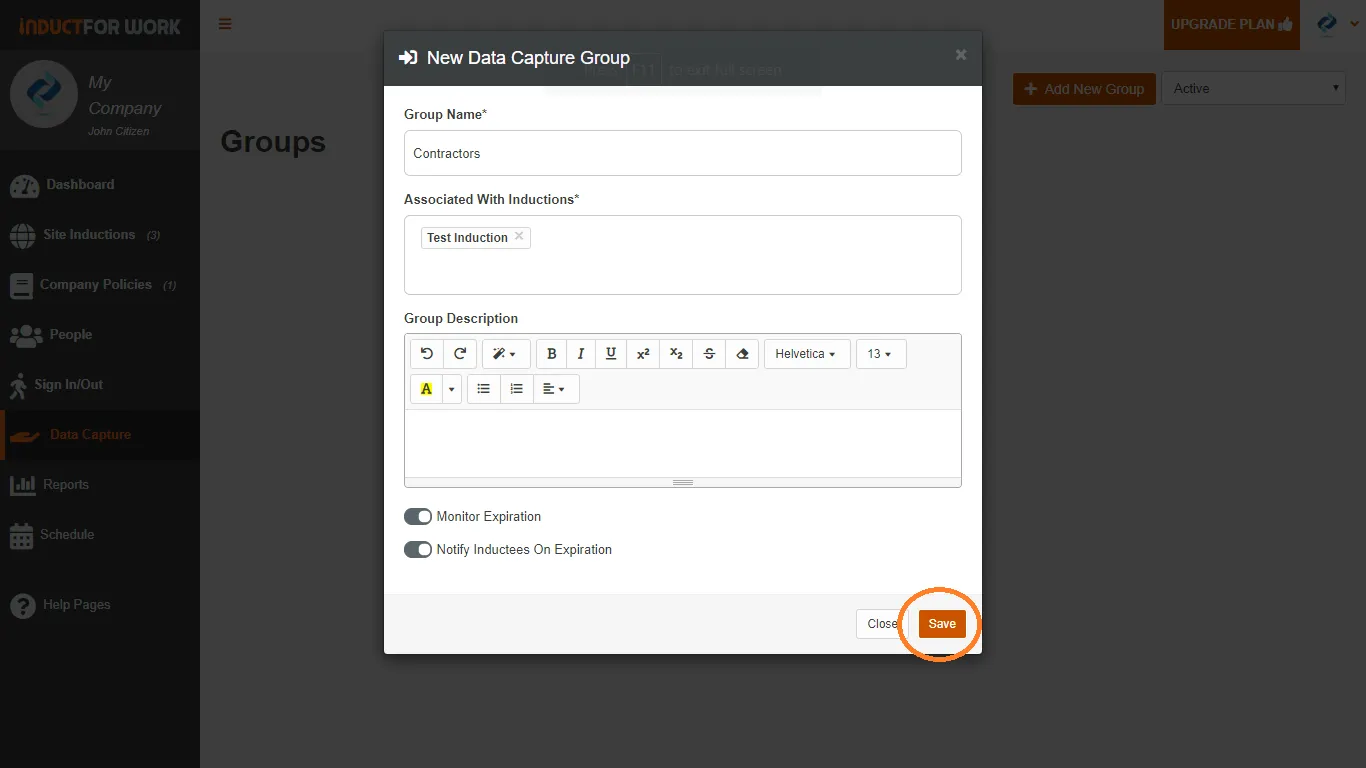
Ok, let’s call our group ‘Contractors’ and we are going to associate it with ‘Test induction’
We are going to Turn ‘Monitor Expiration’ and ‘Notify Inductees on Expiration’ ON
Now click on ‘Save’
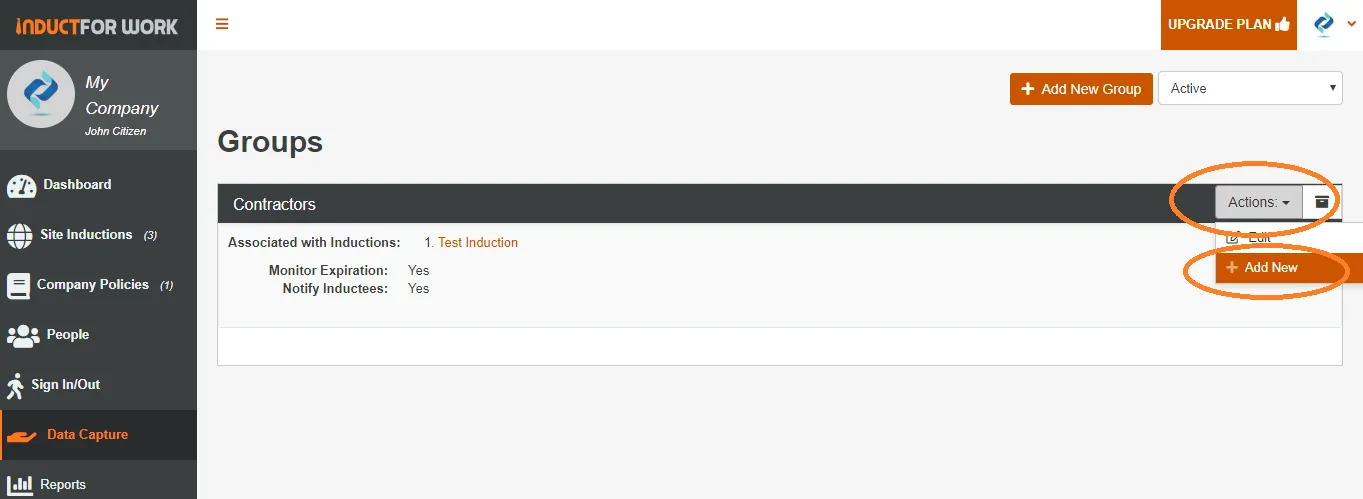
Now we need to add documents to our group. Click on ‘Actions’ and then ‘Add New’.
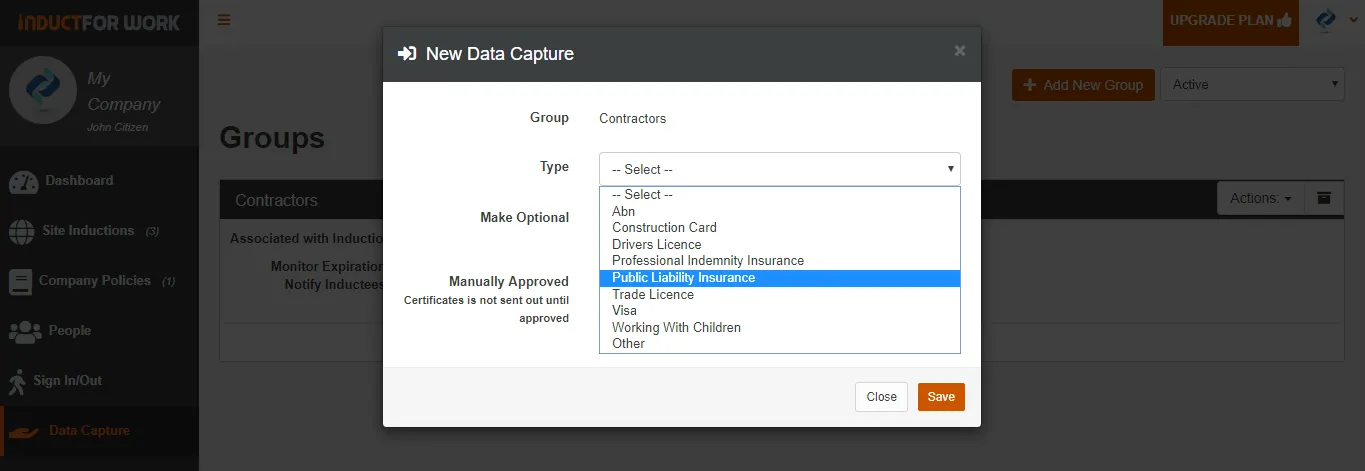
We can choose to add any documents from the dropdown list or we can create our own document by clicking on ‘other’.
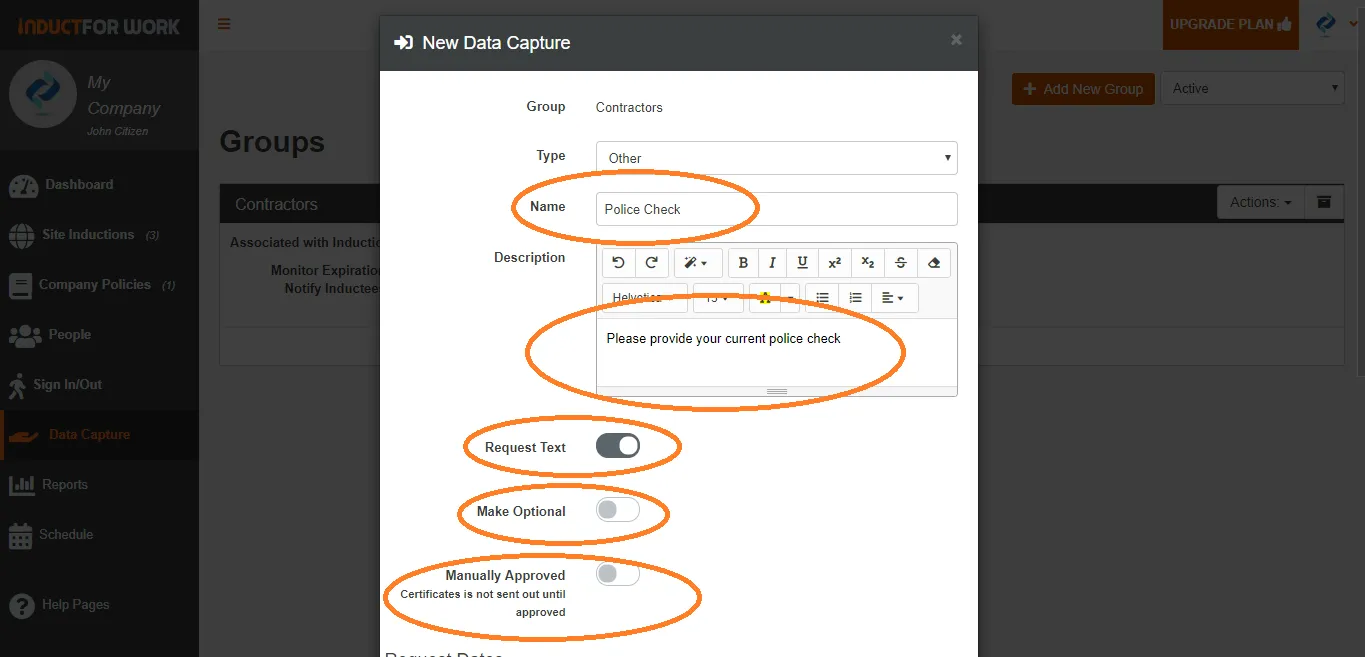
Let’s me show you how to add a ‘Police check’ to our Document group. In the Name we have to type ‘Police Check’, now in the description area we would like to provide our users with a brief description of what we are after, lets type in ‘Please provide your current police check number’.
Now since we are requesting to collect a number we have to turn ‘Request Text’ ON.
Let’s say that a Police Check is a Mandatory doscument that must be provided, then we are going to leave ‘Make Optional’ OFF.
If we wanted to manually approve this Certificate then we would’ve turned ‘Manually Approved’ ON but for now we are going to keep all documents set on automatic approval.
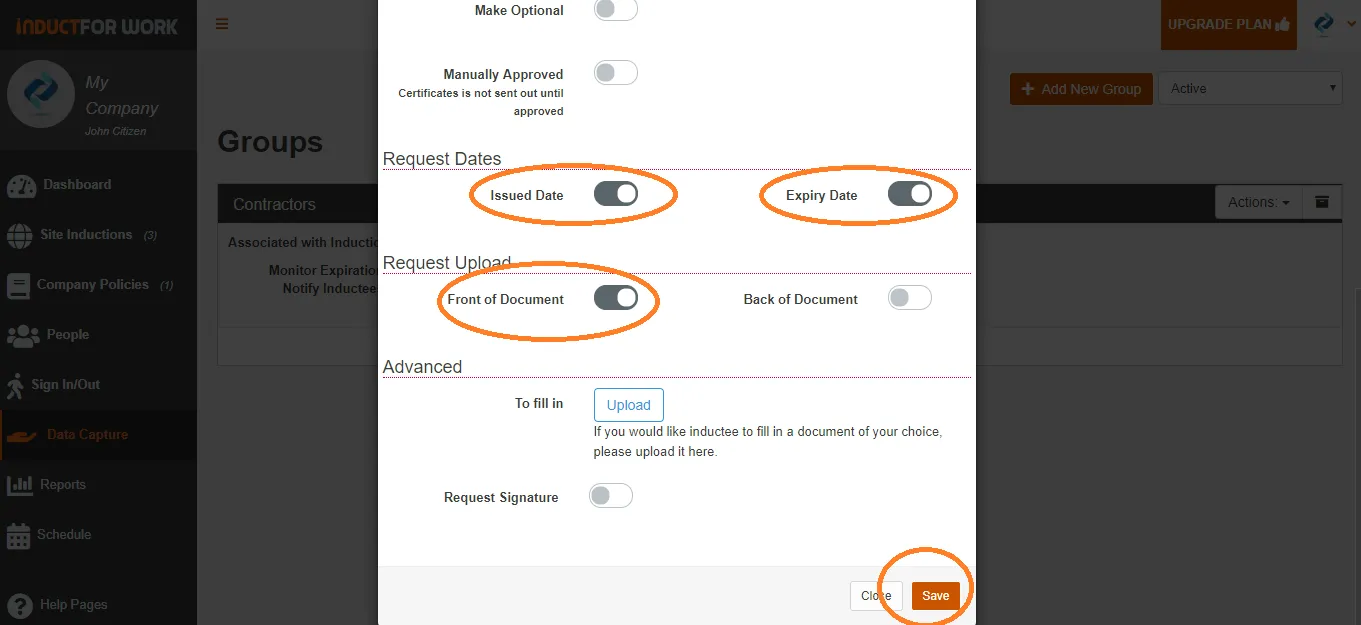
When we scroll down we can see few more options. We can capture document Issue and Expiry dates. Let’s turn them ON, as we need to know when this document expires. We can also request both front and the back of the document to be provided. I am going to request only the front.
If you would like you users to fill out your own editable form, then you can upload it by clicking on Upload button. Your users will then download your form, fill it out and they will be able to upload it back to their induction.
We can also request our users to sign this Document by clicking on ‘Request Signature’.
Now click on Save
So now we have just added a Document called Police Check to our Document Group and attached it to our Test Induction. To add more Documents, just repeat these steps again.
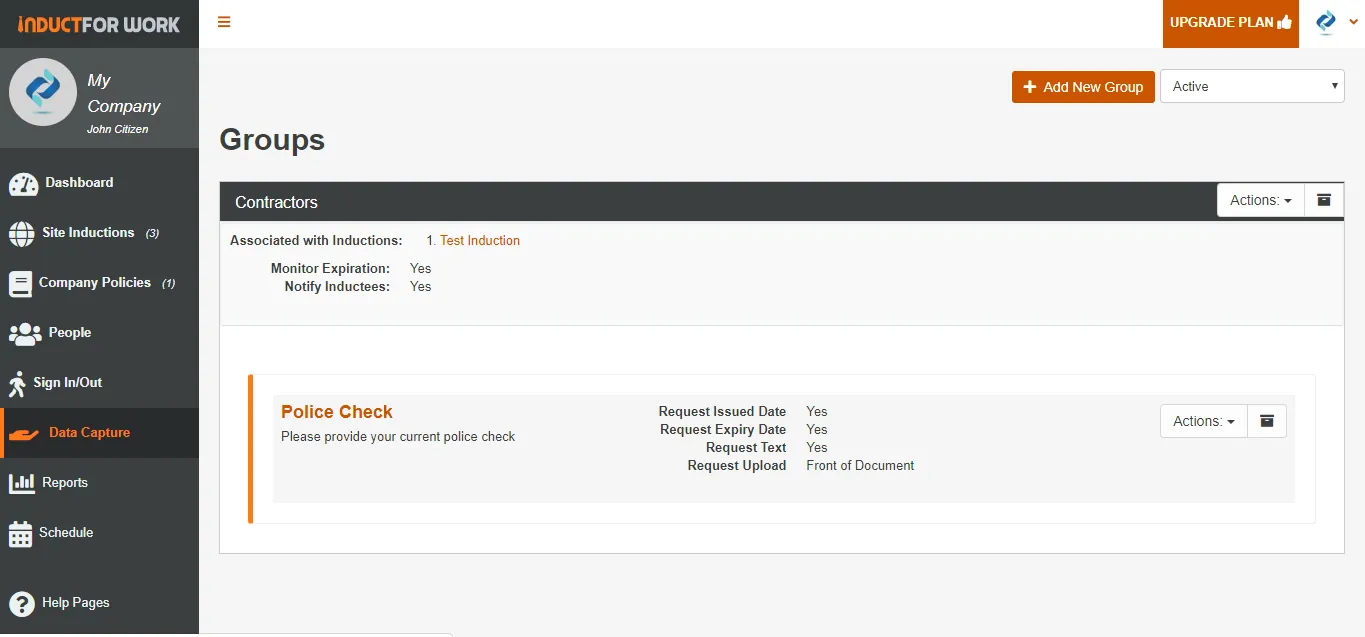
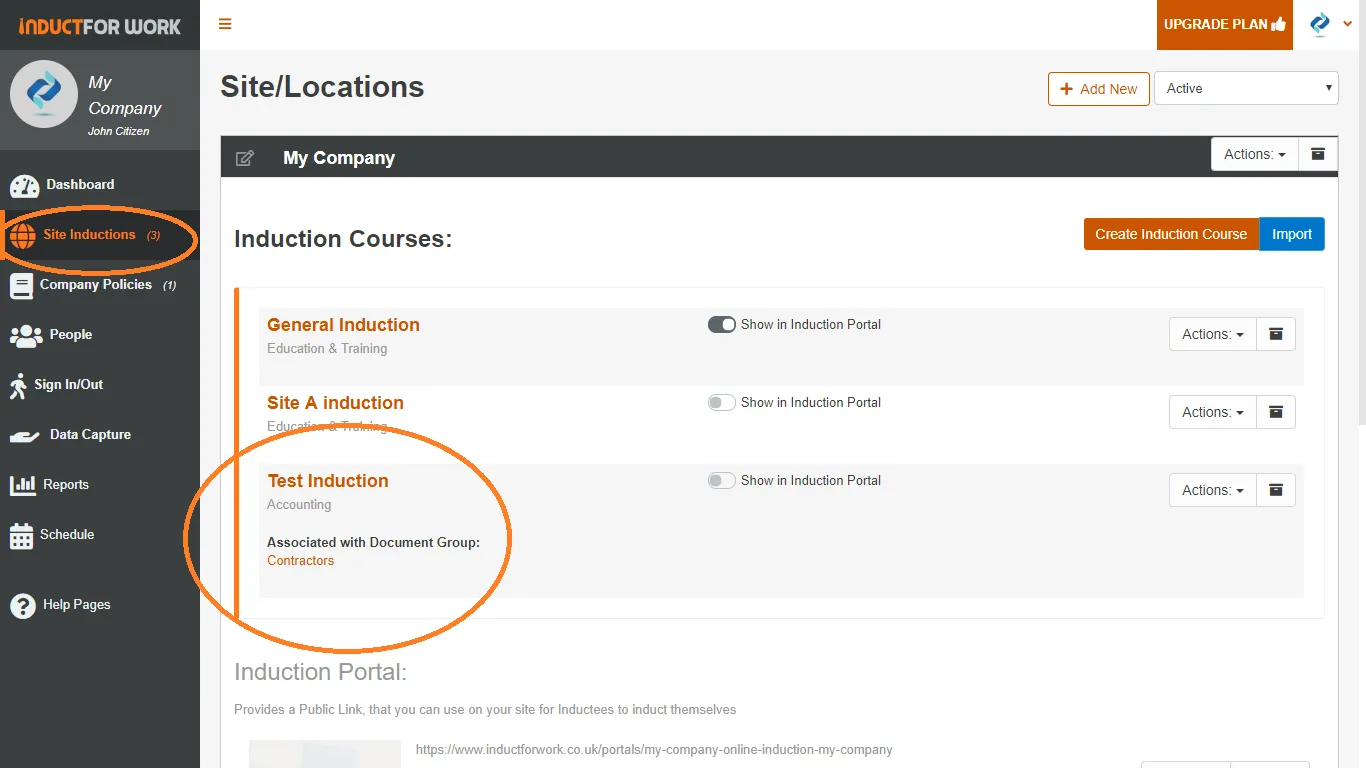
Now when we go back to our Site Inductions we can see that our Test Induction is now associated with Document Group called Contractors. All users going through our Test Induction will be asked to provide us with Documents that are set in our Contractor document group.
In our next help page we will cover how to send invites to online inductions. Happy inducting!
