24 Updating Portal Contact
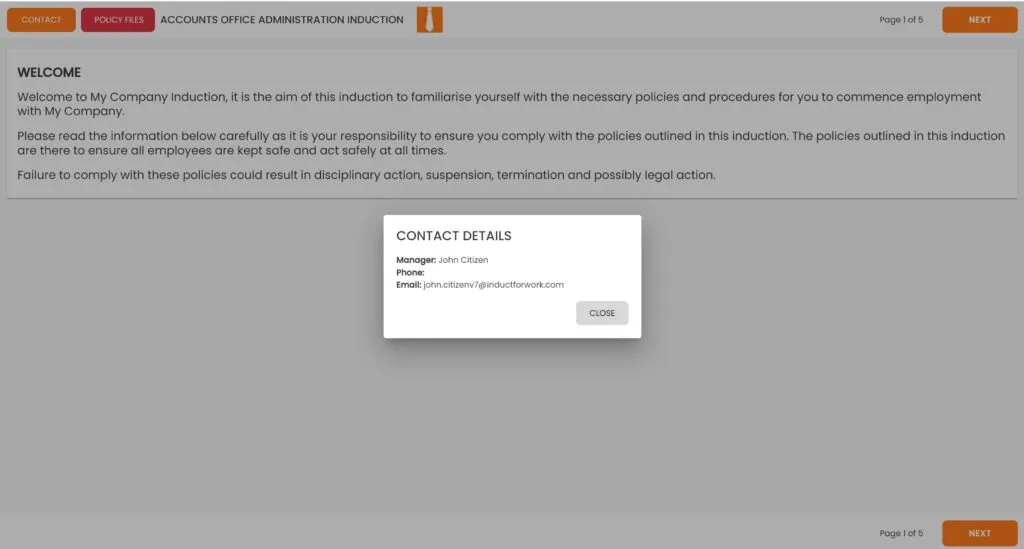
Users can access your company’s contact details when visiting Portals or during their induction process. The company details are displayed in each Portal.
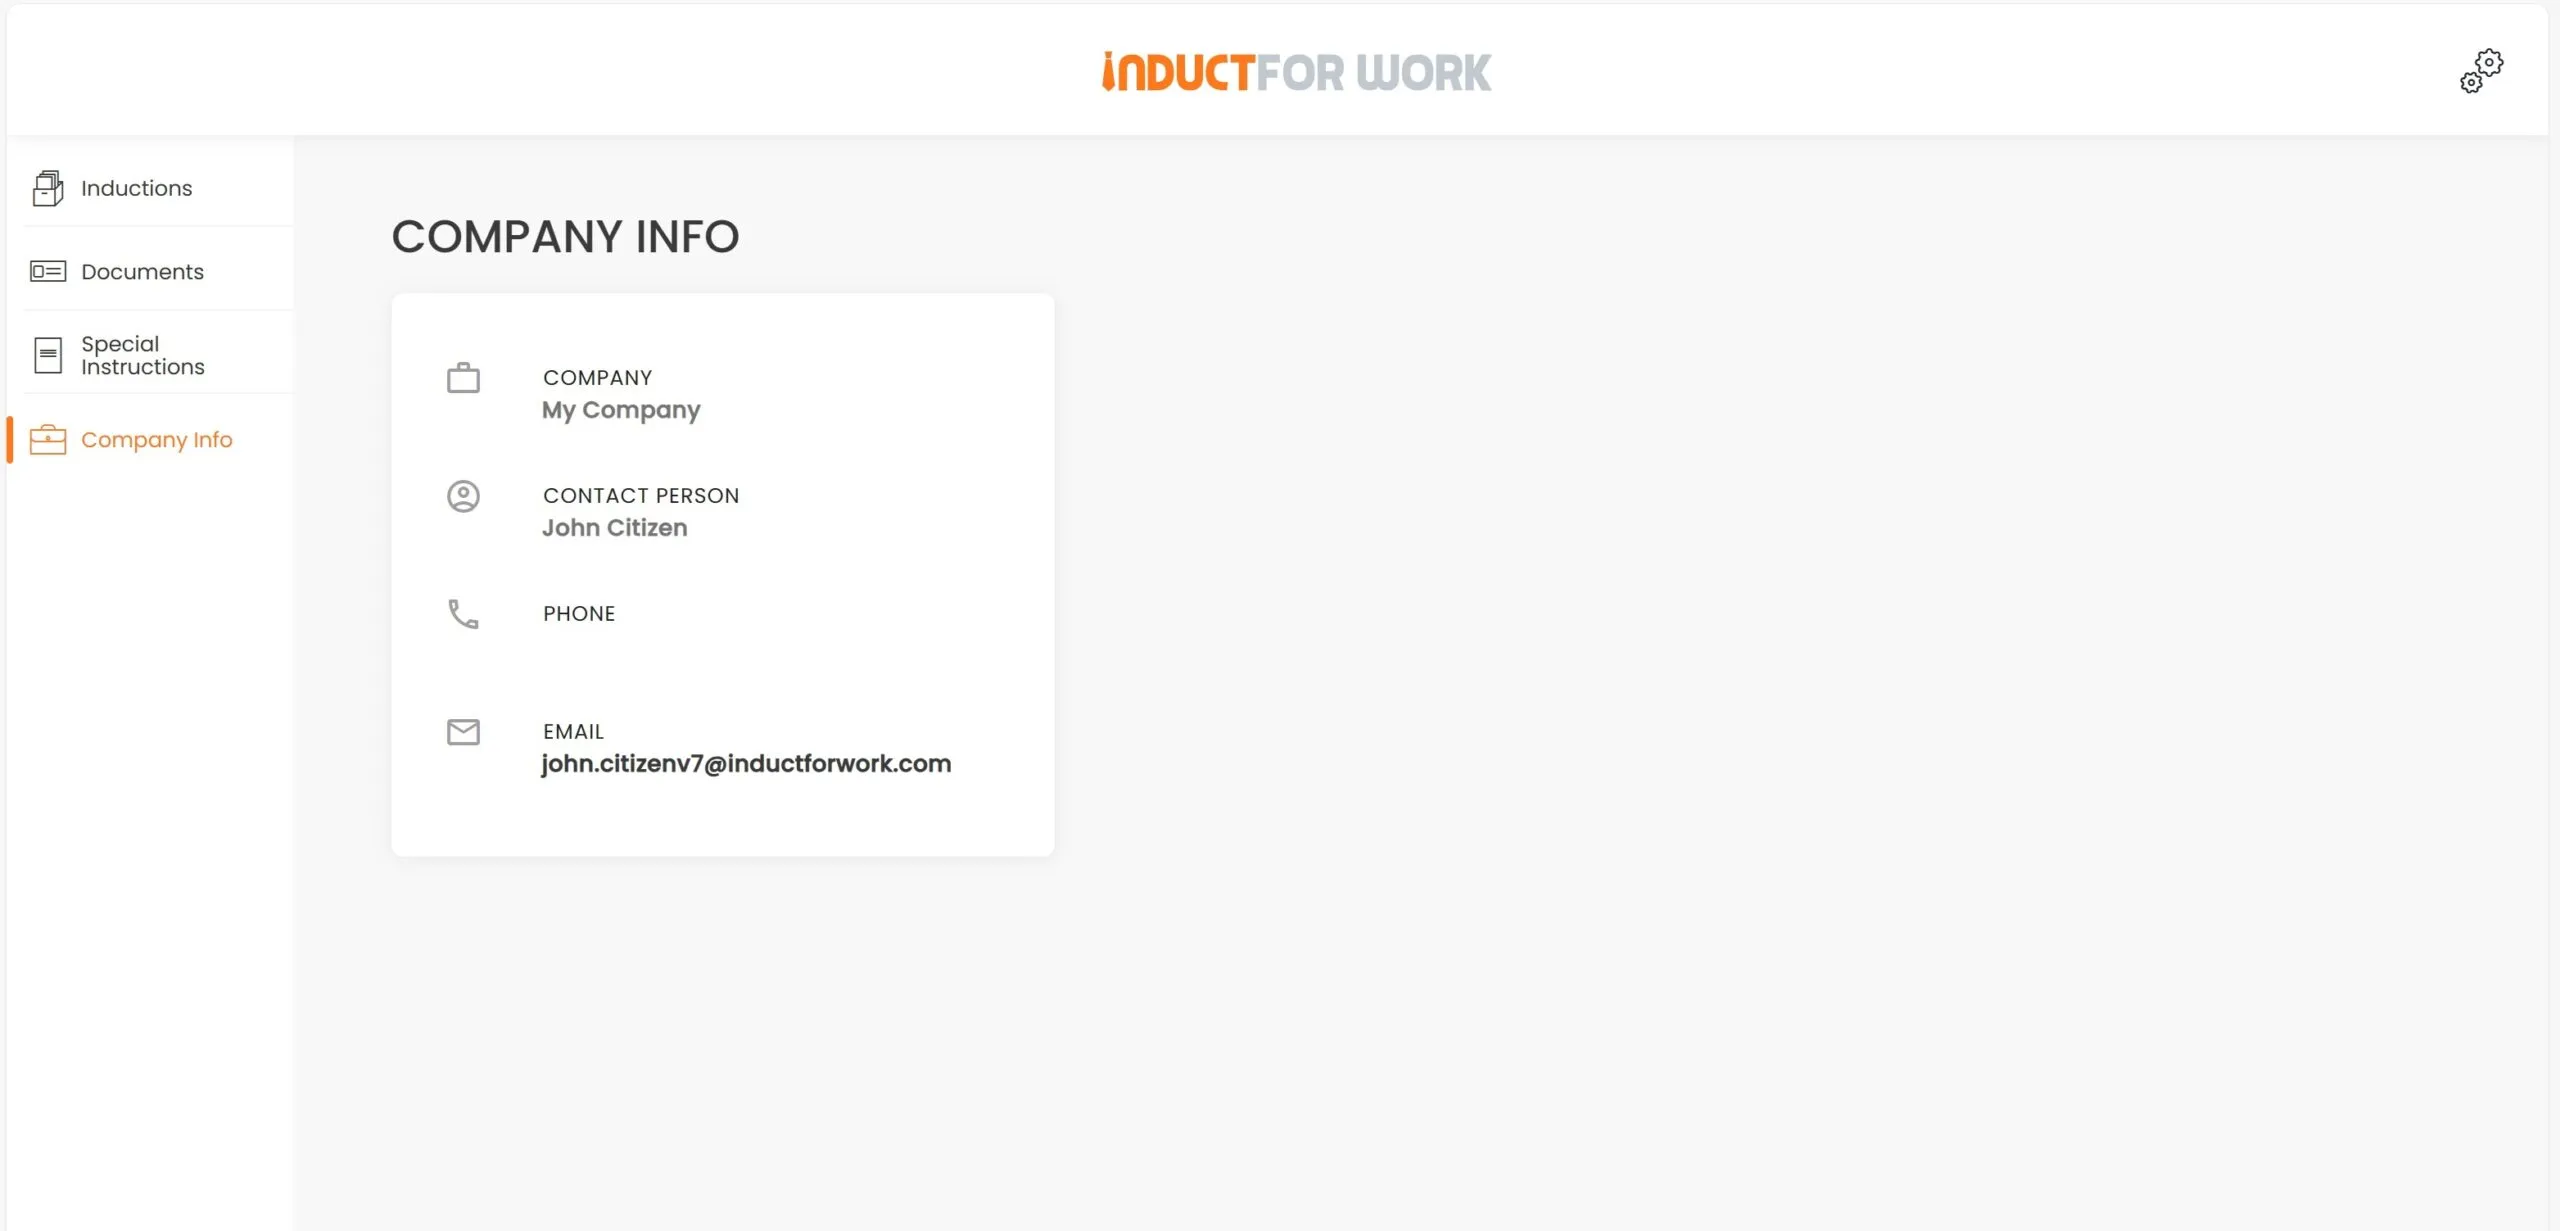
And within their Inductions.
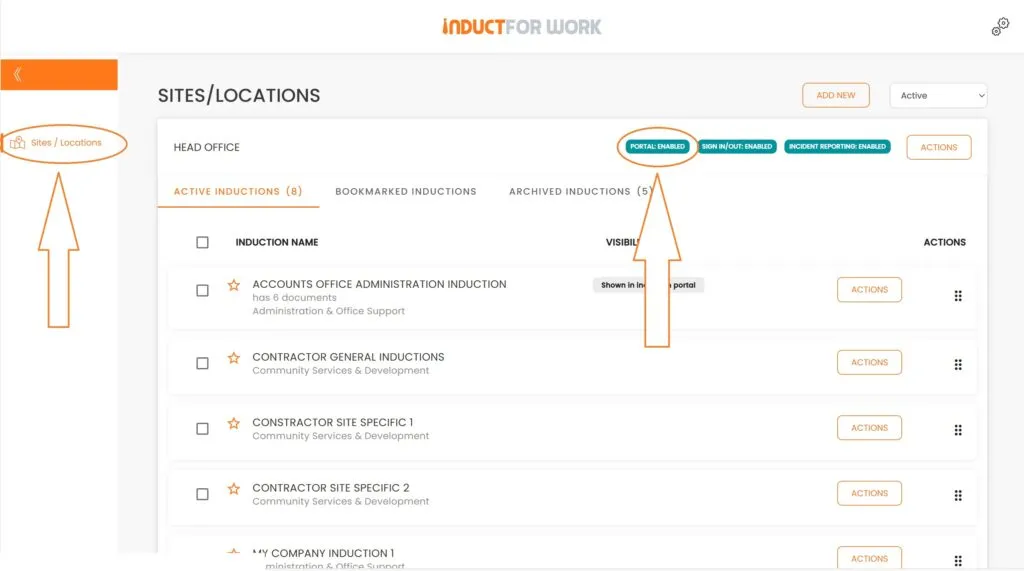
If you operate multiple Portals, you have the option to display a different contact for each Portal. To navigate to this section, click on ‘Site Inductions’, followed by your chosen Portal.
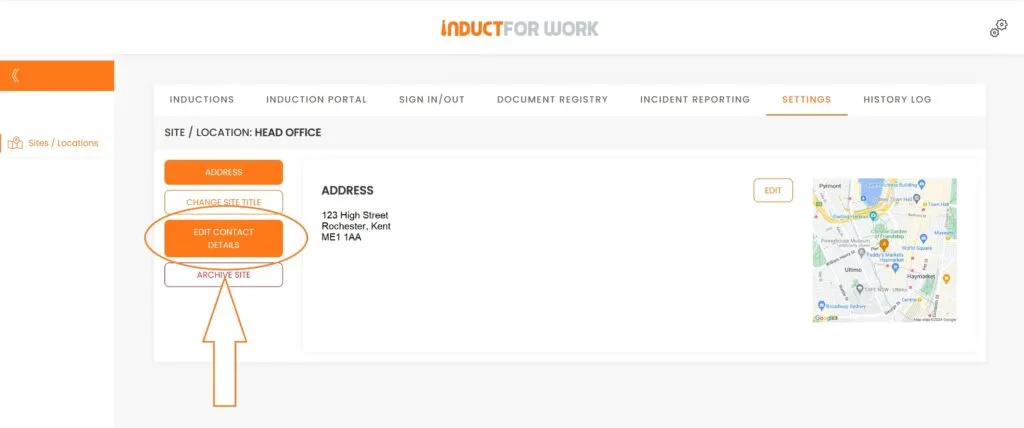
Go to ‘Settings’.
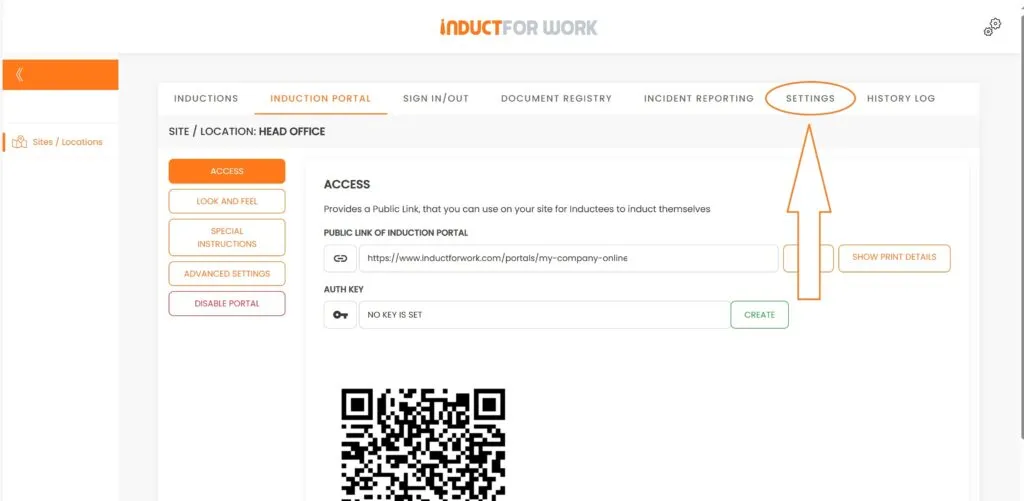
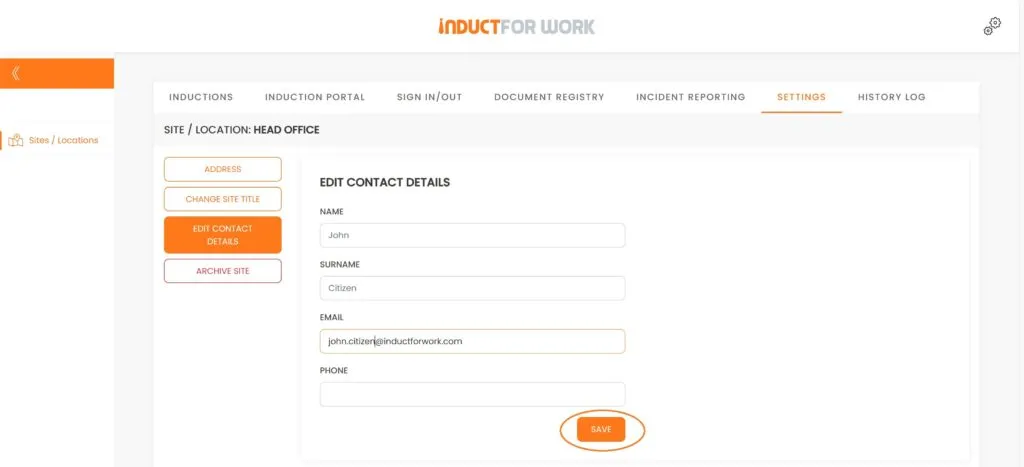
You will see a number of editable Portal details including: ‘Address’, ‘Title’ and ‘Contact details’. Let’s go ahead and click on ‘Edit Contact Details’.
Update details and click ‘Save’.
This brings us to the end of this Training Session. Please continue to Session #25 to learn how you to cancel Induction Invites. Thank you.