3. Creating and Importing Inductions
Let’s explore how to create Online Induction Courses and Sites.
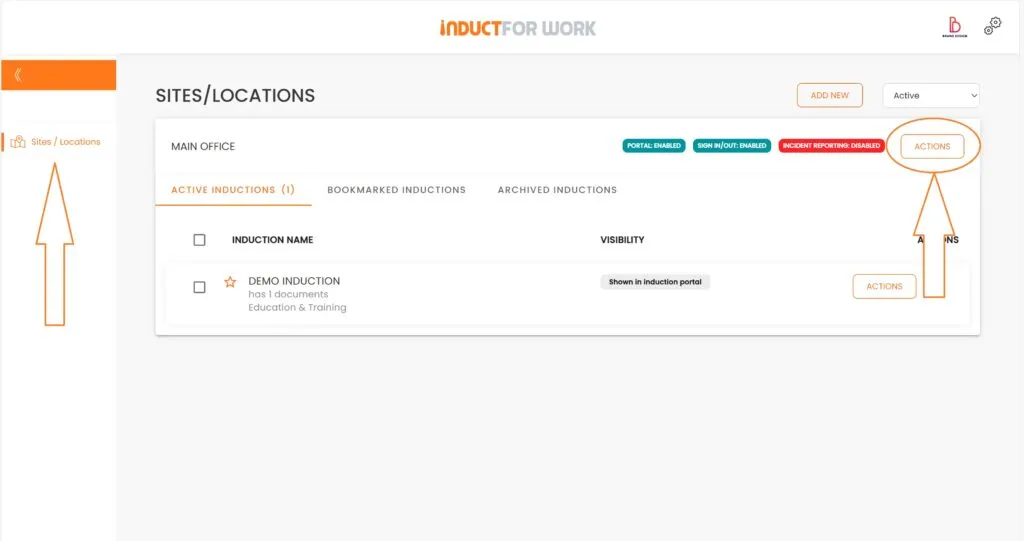
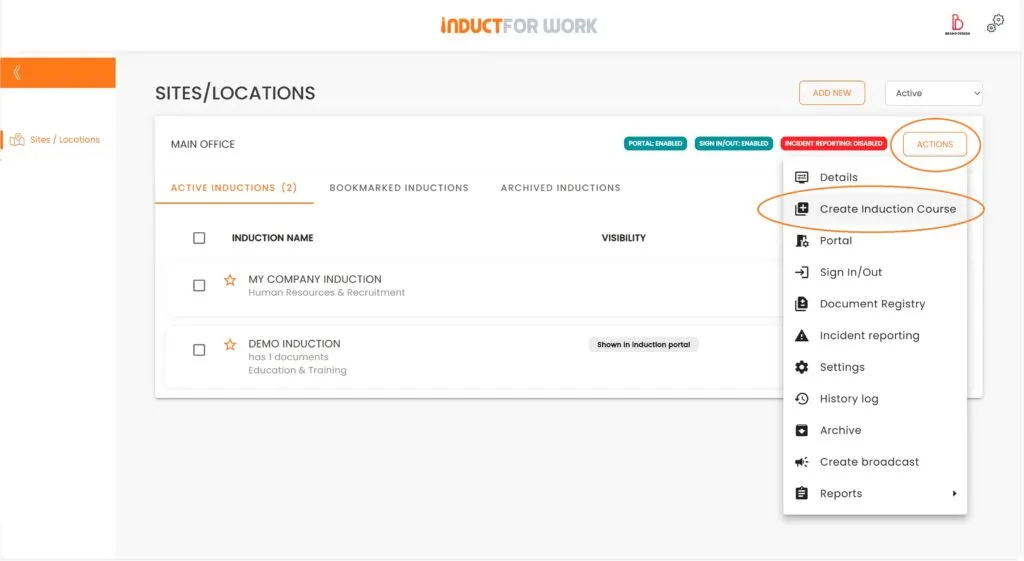
First, click on ‘Sites/Locations’ on your left. Then, click on the ‘Actions’ button to your right.
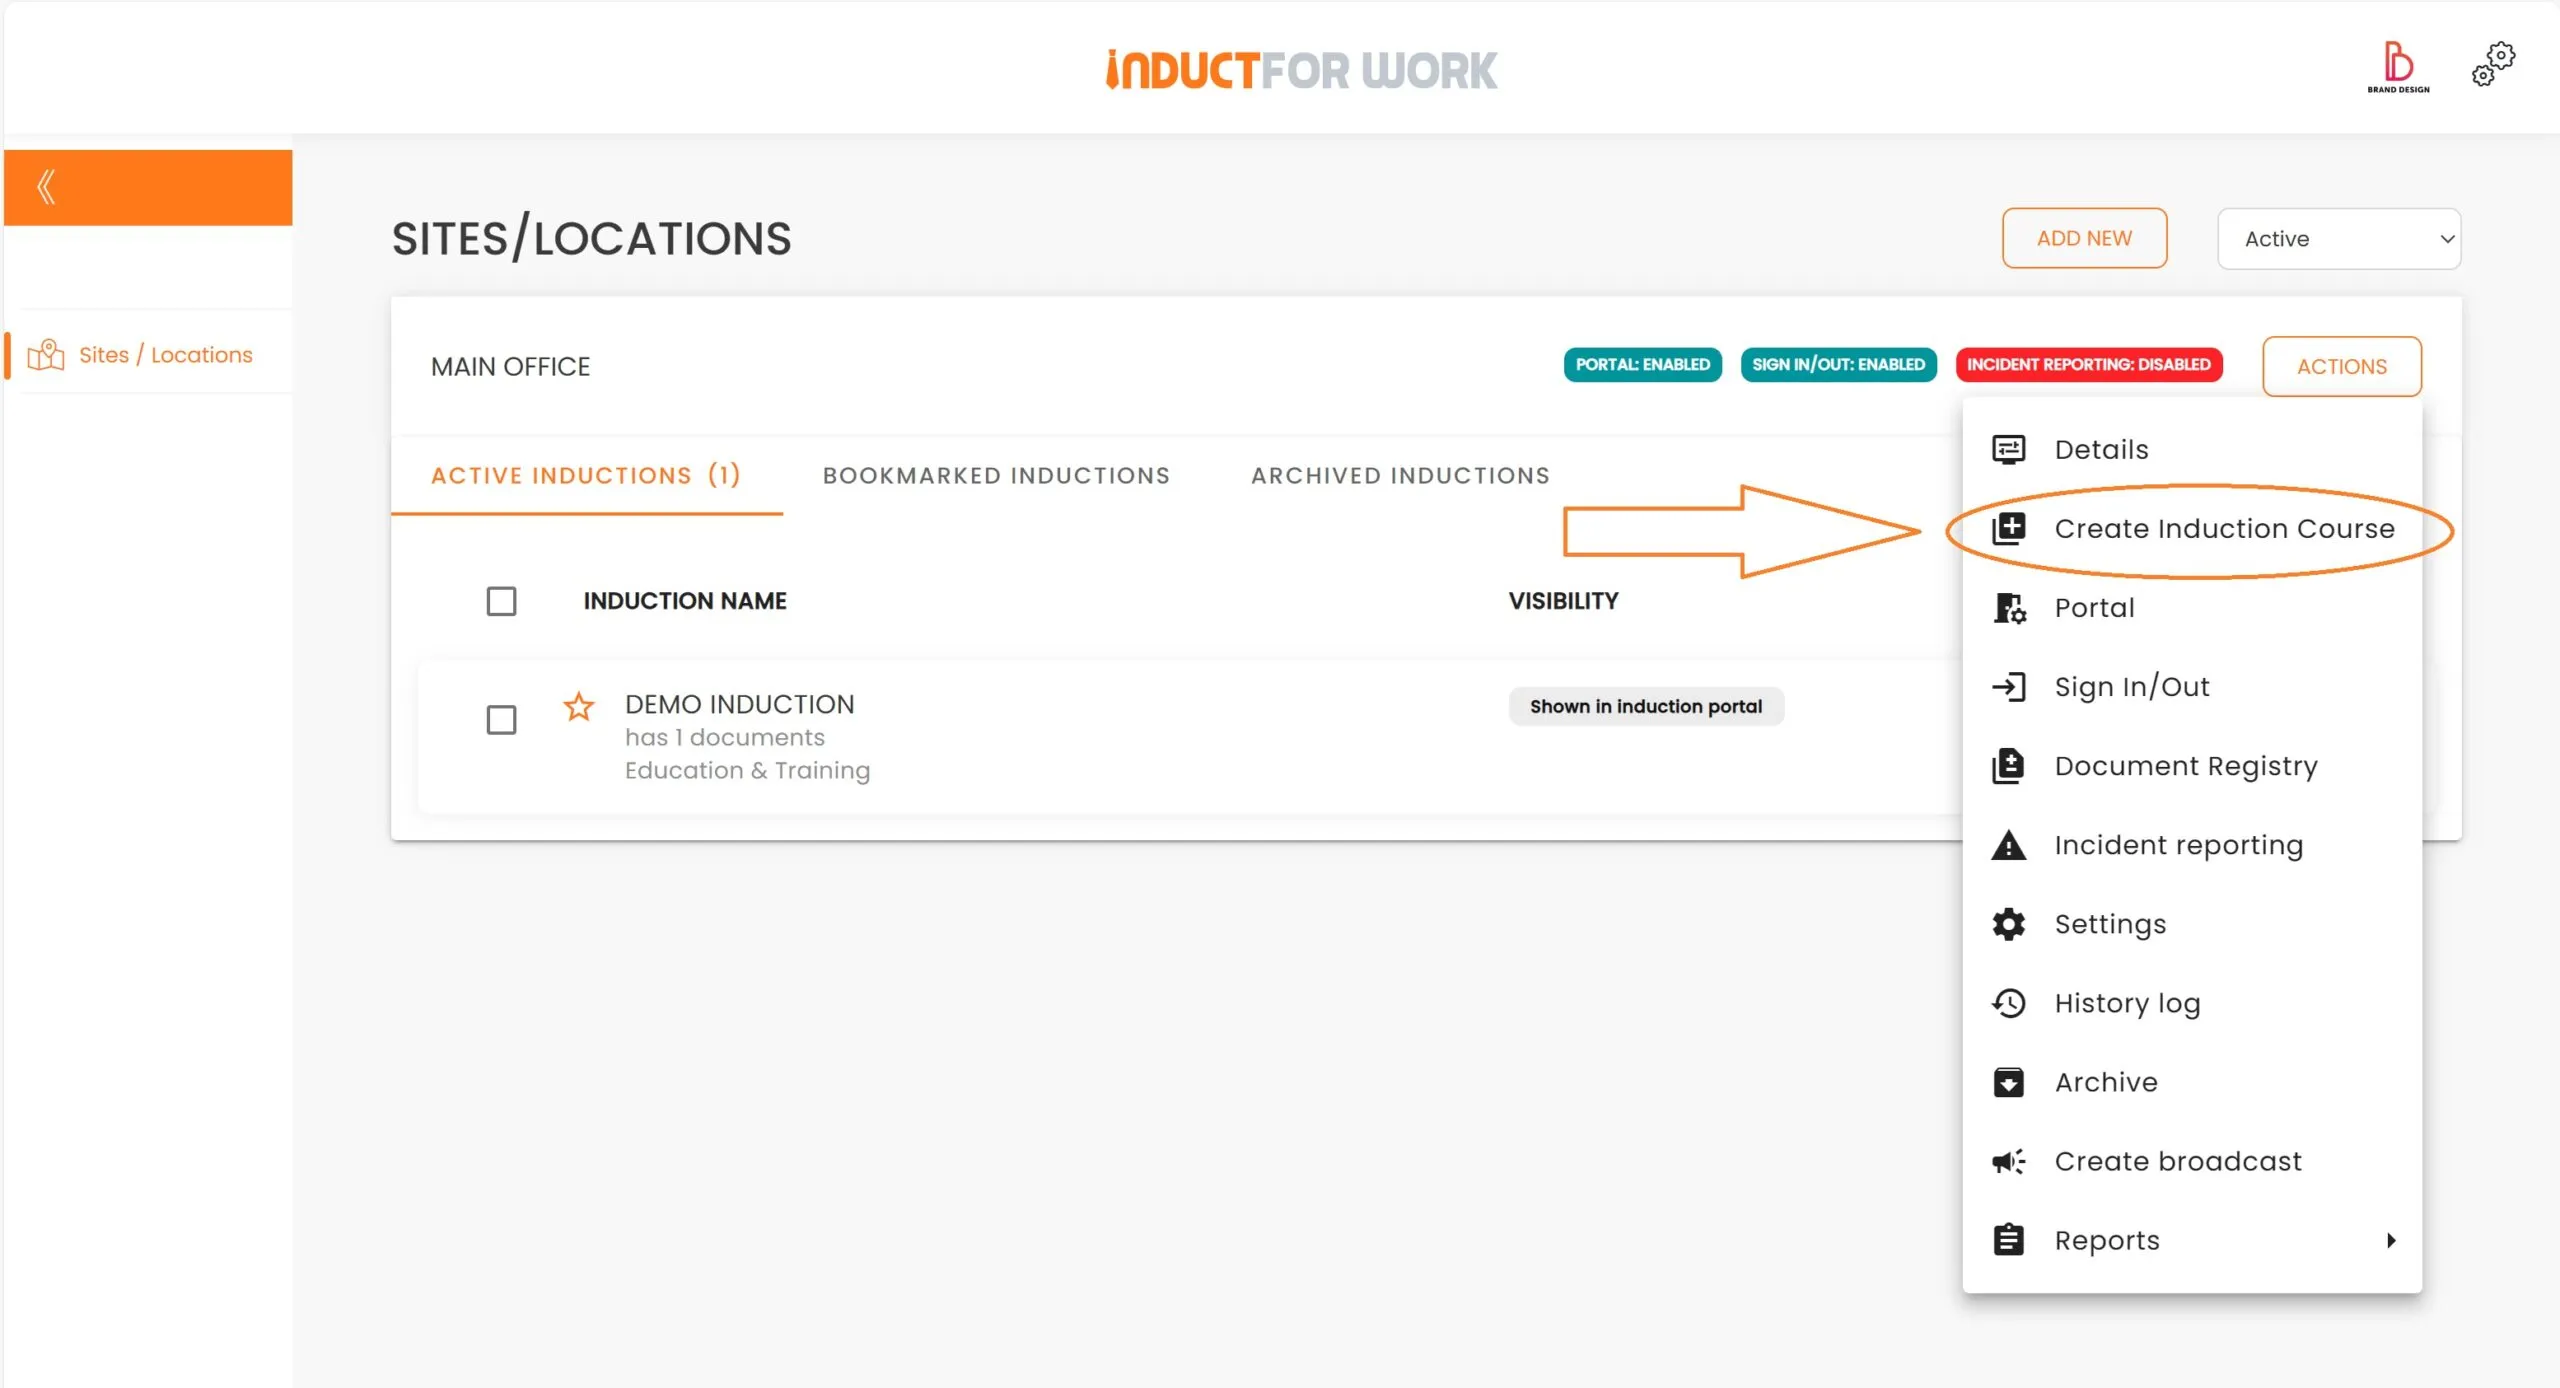
Select ‘Create Induction Course’ from the dropdown menu.
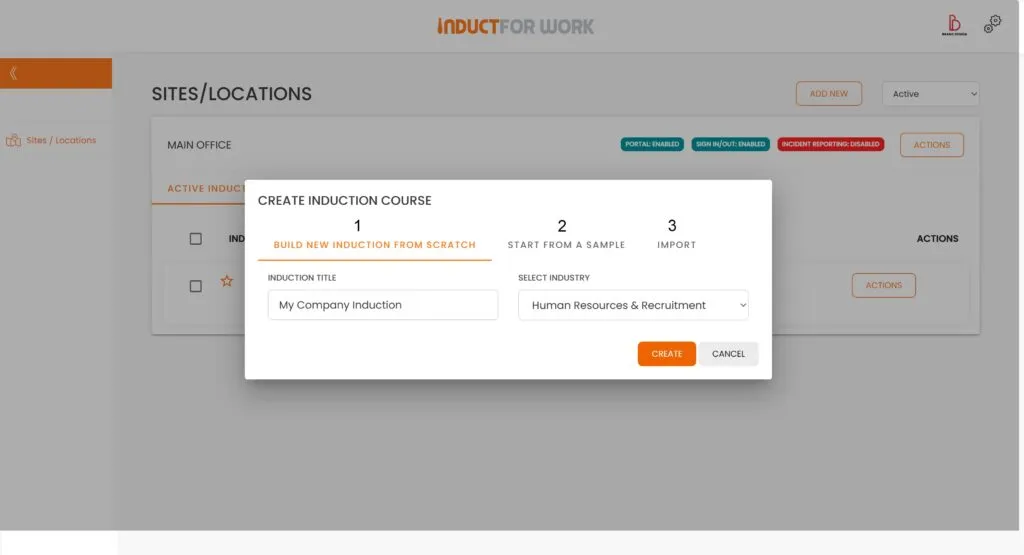
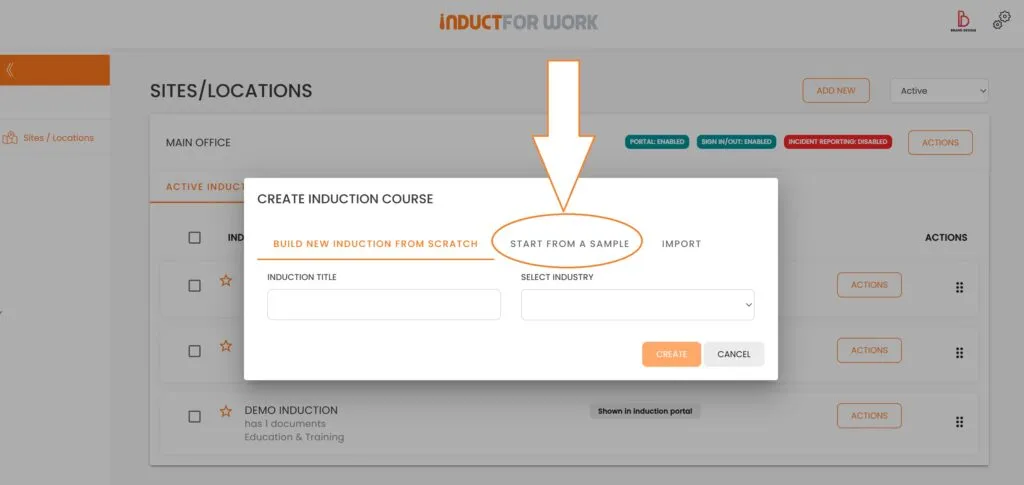
We have 3 options:
- We can start building our induction from scratch
- or download and then edit a Sample Induction
- or to Import our PowerPoint or Scorm Induction
1. Build New Induction from Scratch
1. To build a new Induction from scratch, enter the Induction Title, for example, “My Company Induction,” select an Industry such as Human Resources and Recruitment and then click ‘Create.’
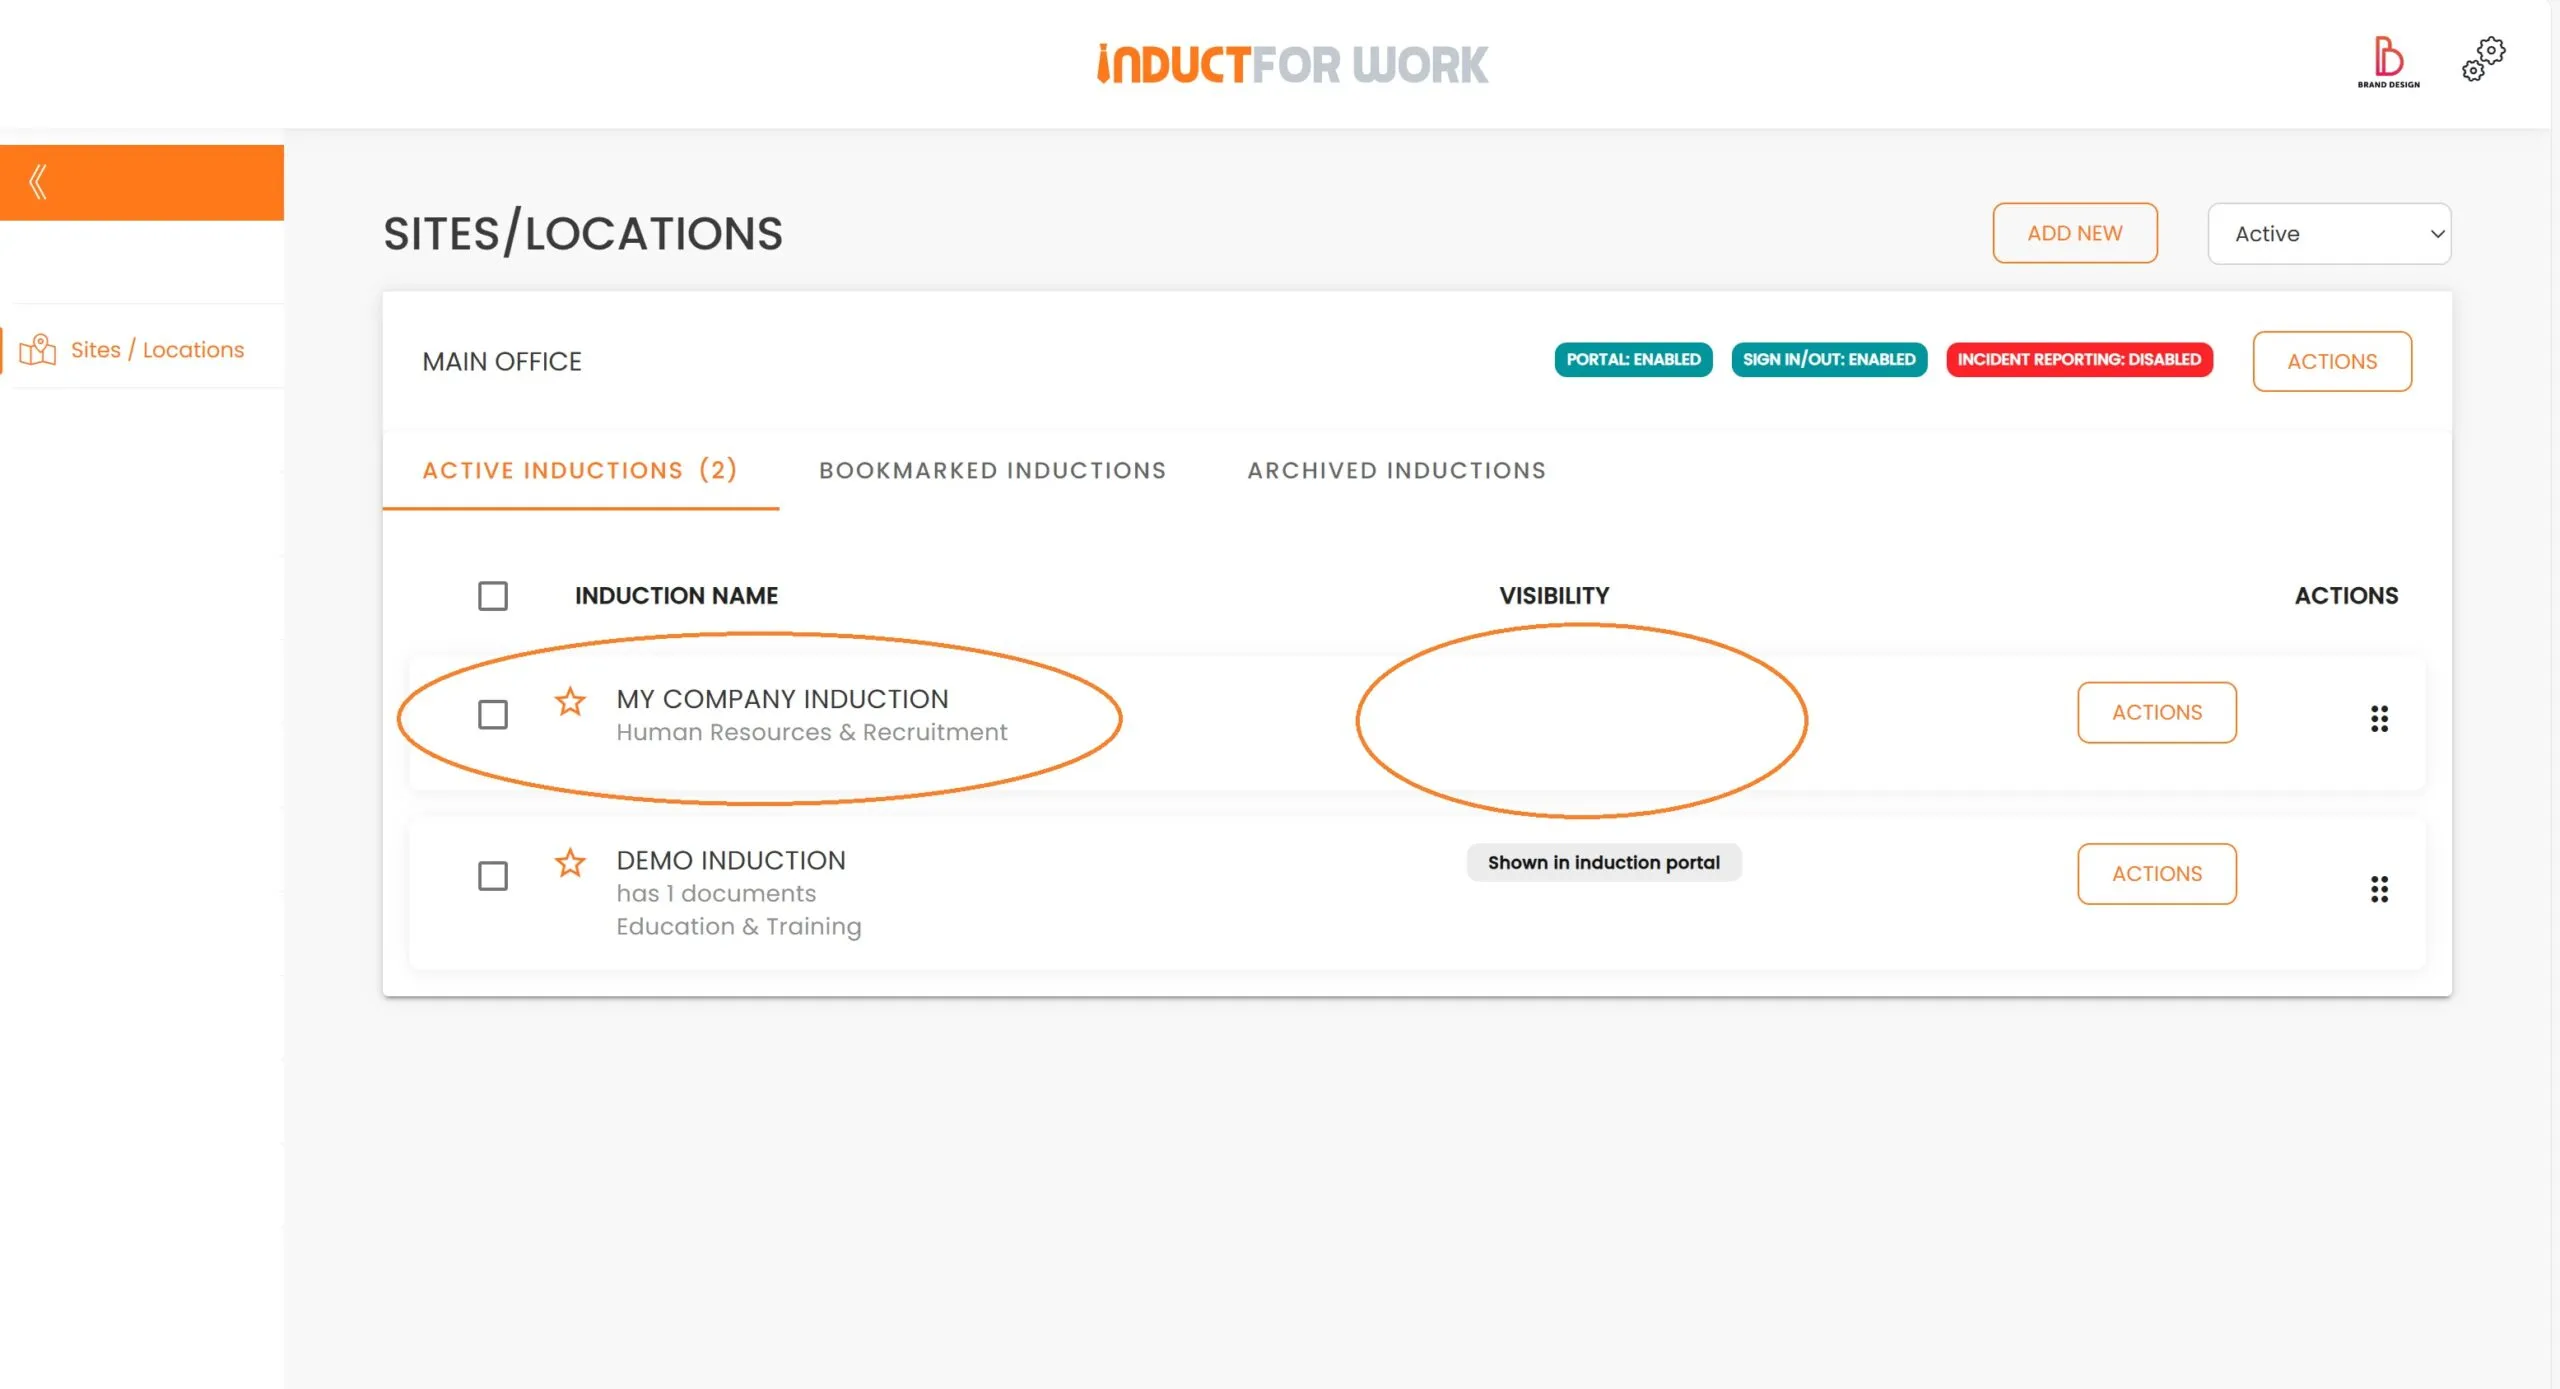
You have now created your first Induction Course, which is currently blank and not visible to any users.
2. Start from a Sample
To create an induction from a sample, click on ‘Actions’, then select ‘Create Induction Course’.
Now, we need to select ‘Start From a Sample’.
Select ‘Administration and Office Support’ and then ‘Use this Sample’.

And here you have your Sample Induction.
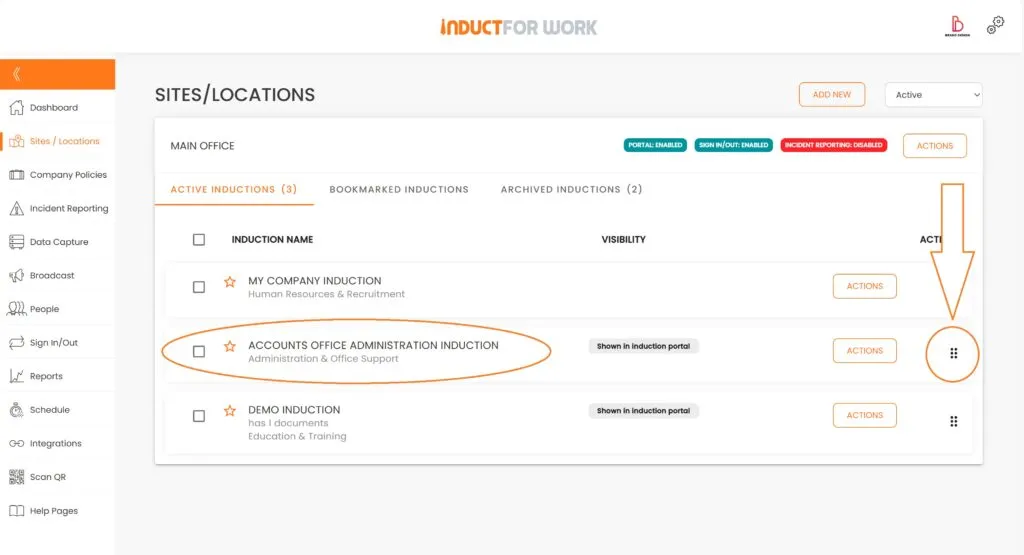
If you need to move your Induction up or down, what you need to do is position your mouse over the dots, click on them and while holding the mouse button drag and drop the Induction to the top.
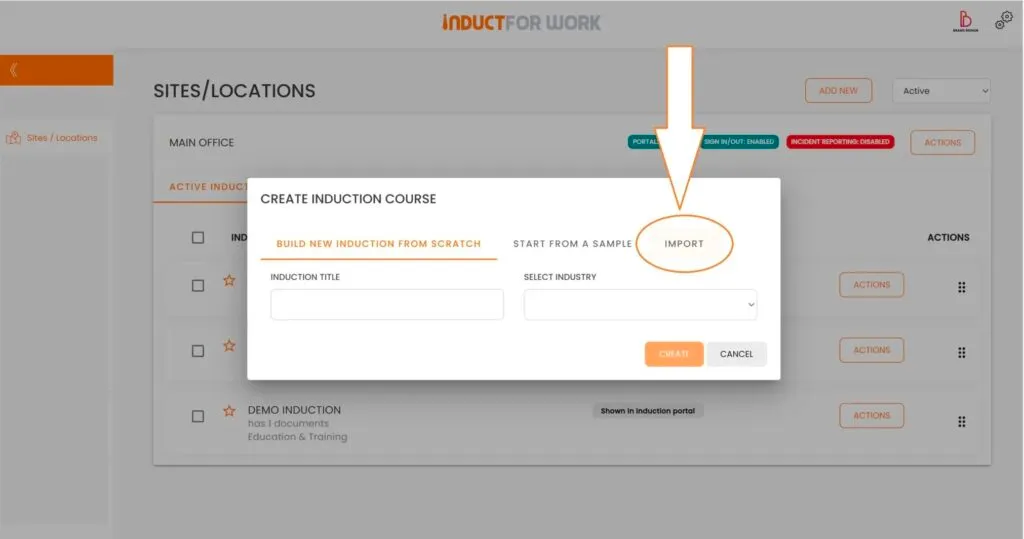
3. Importing PowerPoint or Scorm Inductions
Let’s go back to our ‘Actions’ button and ‘Create Induction Course’
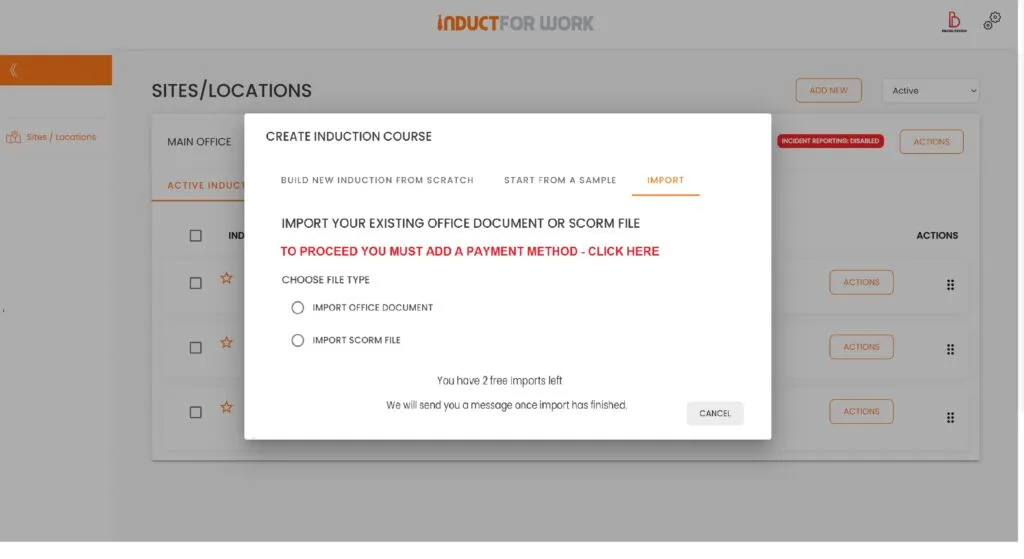
And this time click on ‘Import’.
To convert and upload files to the system, a valid payment method is required. Two free file conversions are offered each month; subsequent conversions cost £10 per file. PowerPoint files are first converted to images and then added to as induction slides. Scorm inductions are different; you can use Scorm files but no changes to its original content can be made..
This brings us to the end of this Training Session. Please continue to Session #4 to learn how to use Induction Editor. Thank you.