4. Induction Editor
To be able to create and modify induction training we need to look at how induction editor works. Let’s click on our recently created induction from a sample – Accounts Office Administration Induction.
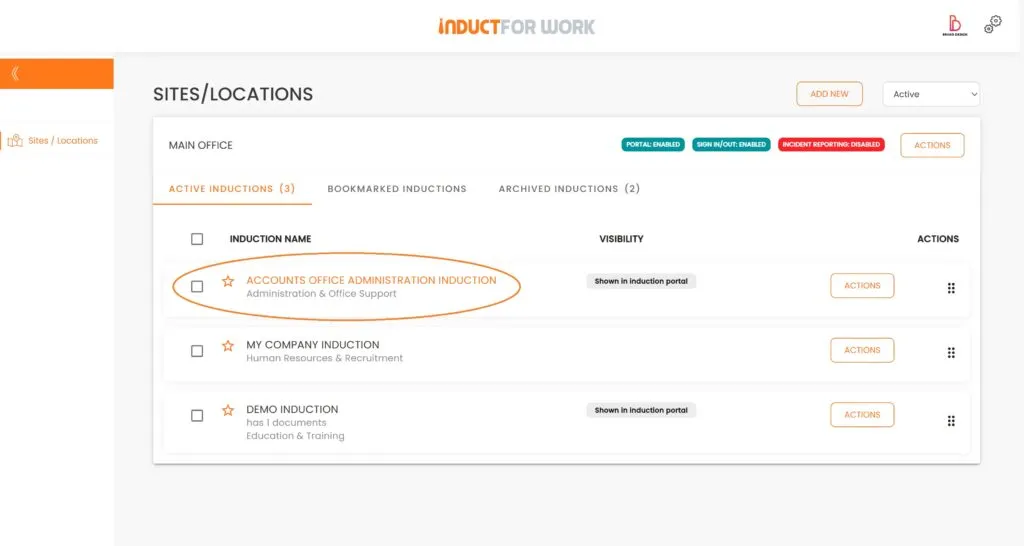
Within your induction, you’ll find several distinct areas. We’ll review each one individually.
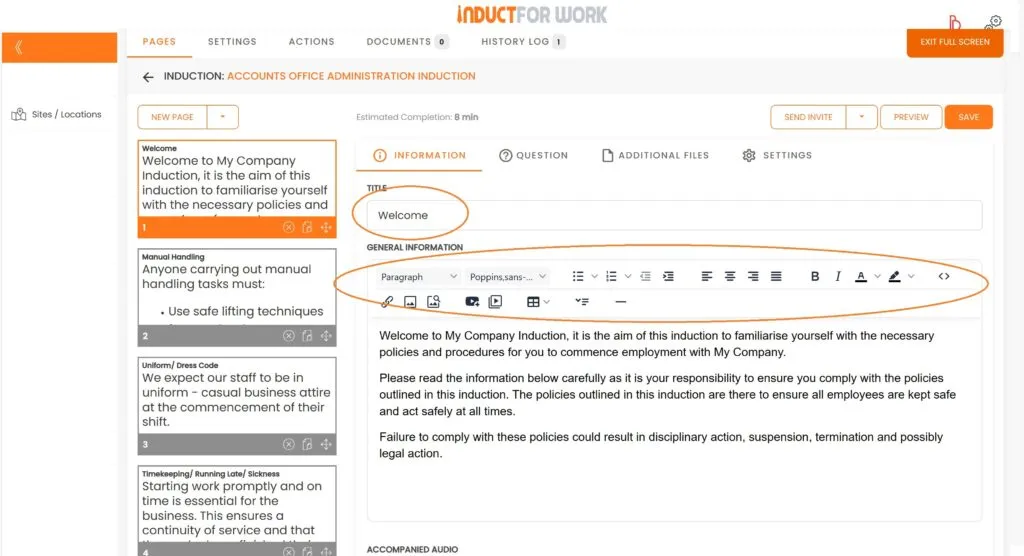
First, let’s examine our Slides section. Here, you have the option to add or delete slides, duplicate or relocate them. Clicking on a slide will display its contents on the right side.
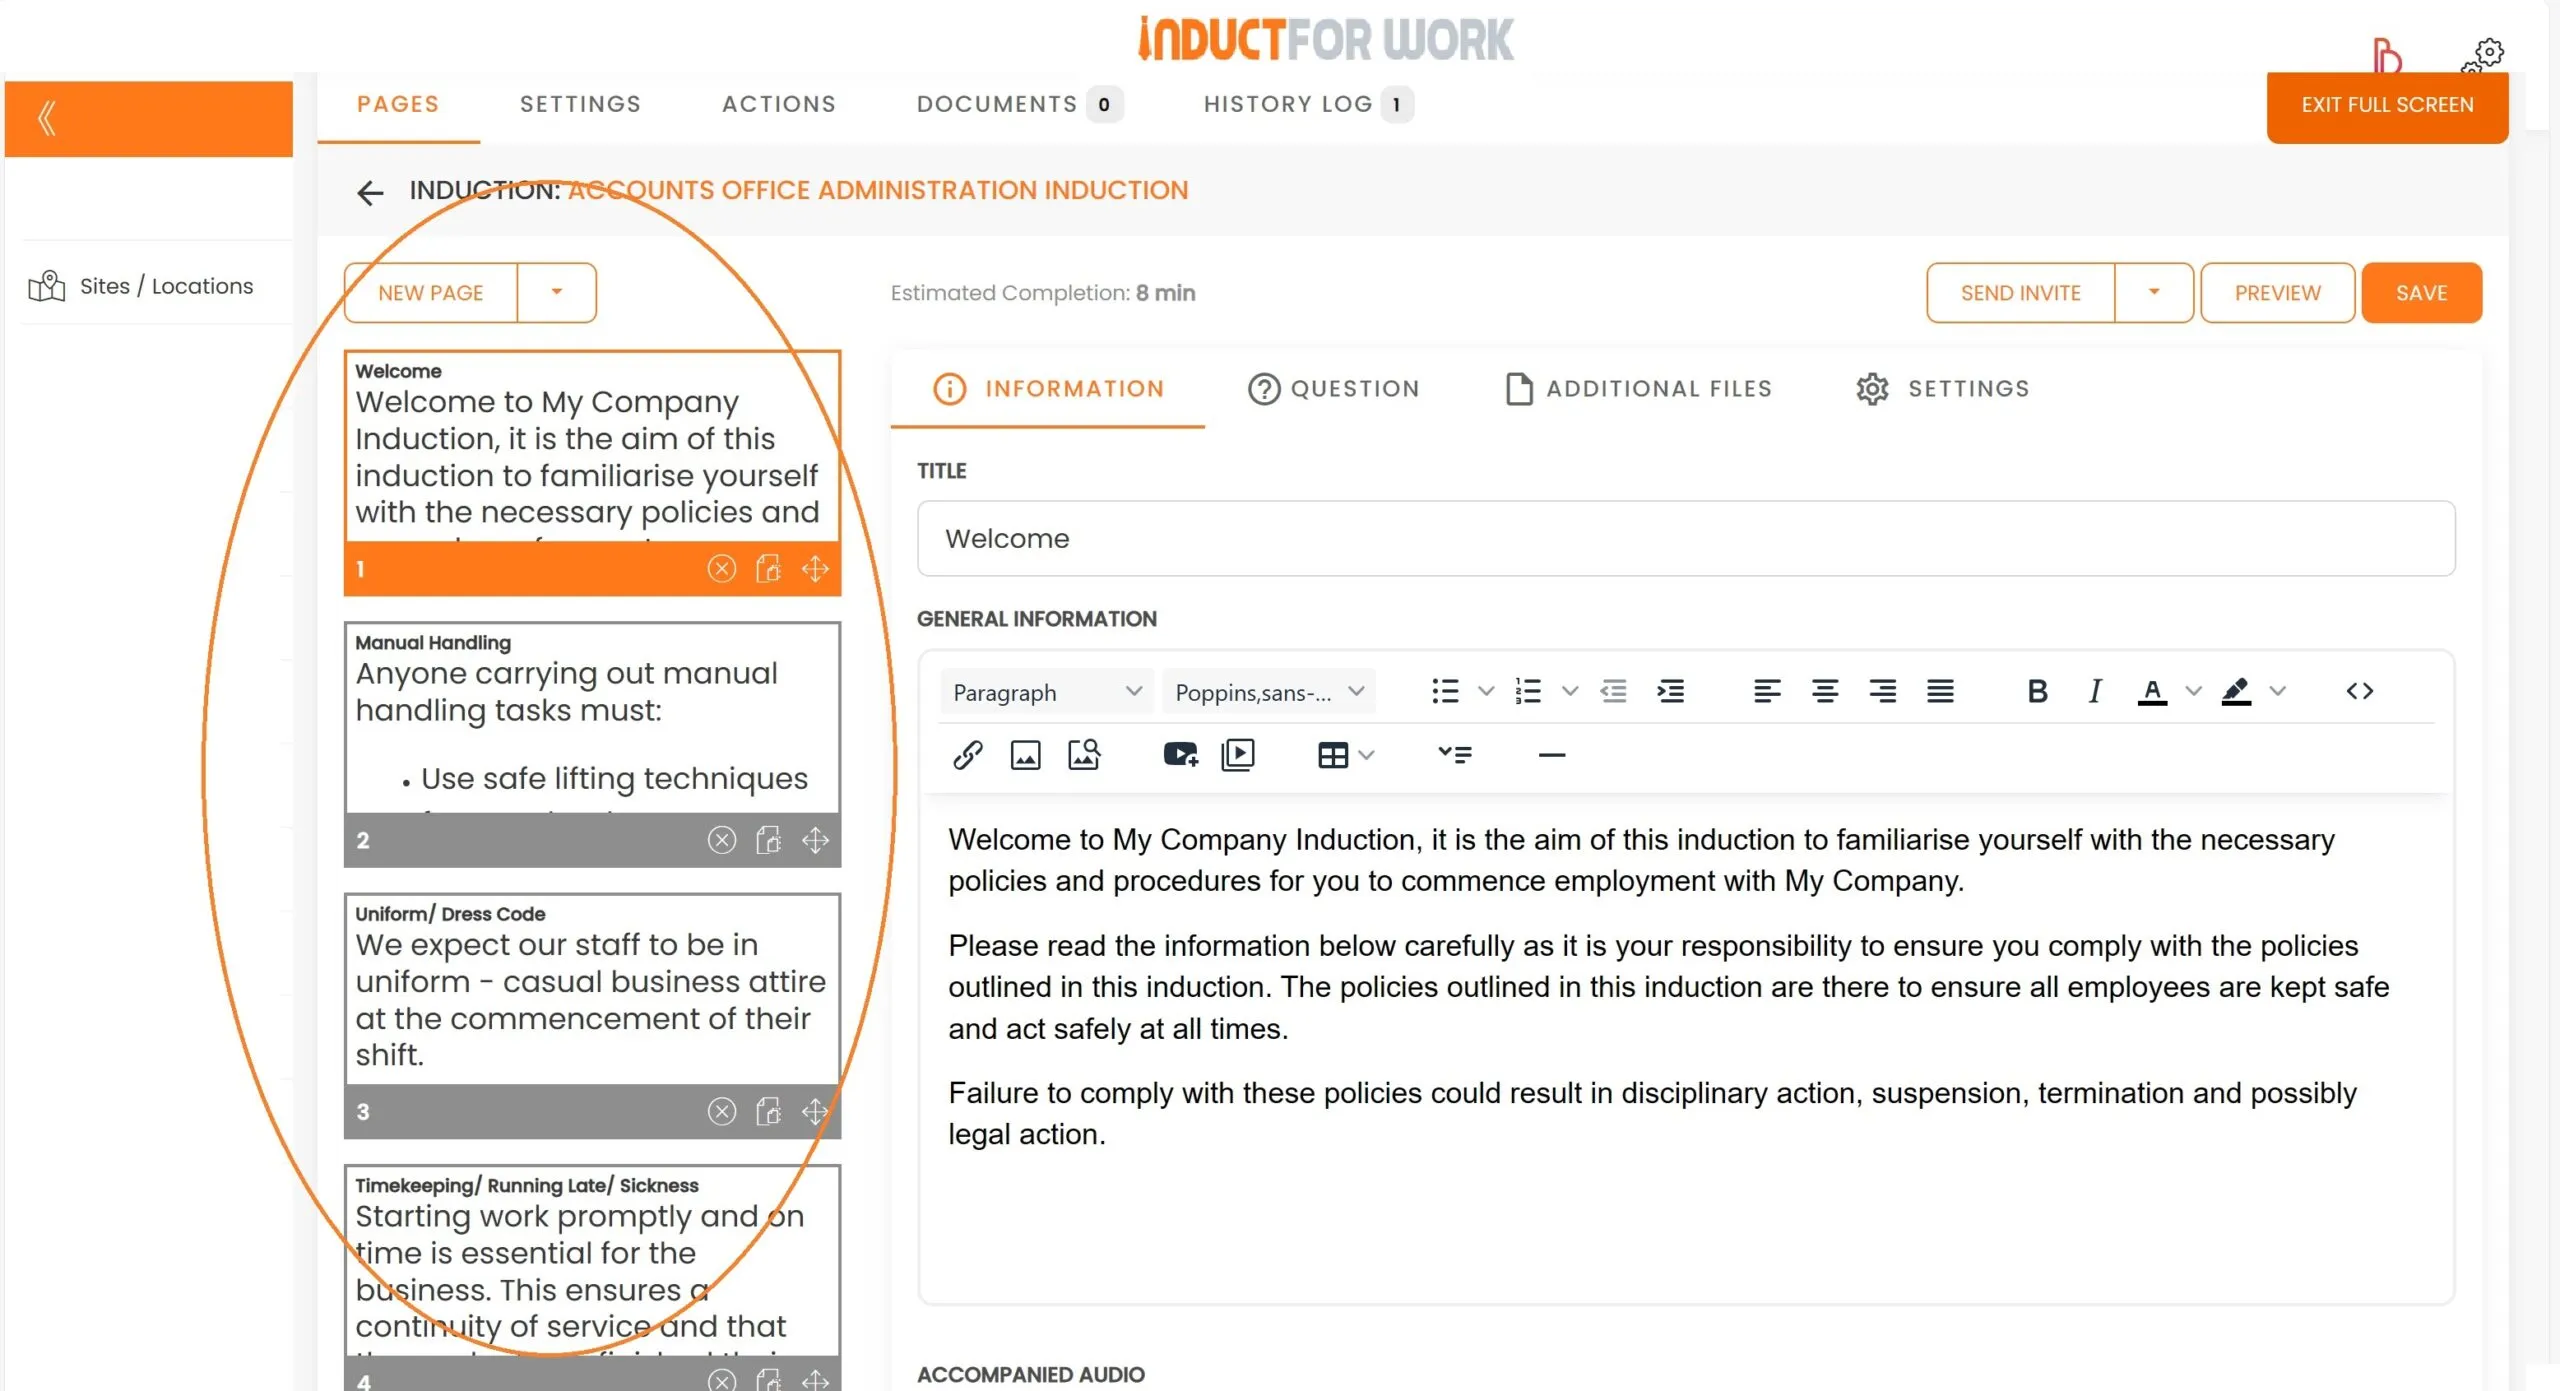
The title, text, and images on each slide can be updated. You have the flexibility to modify sizes, fonts and so much more.
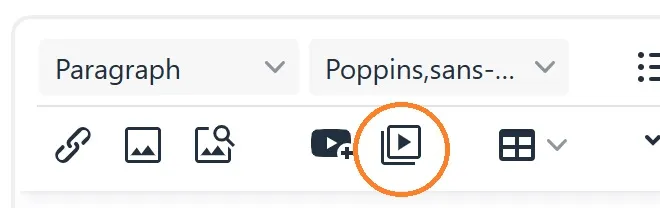
To embed a video link to your induction slide find the icon.

To upload and utilize your own video file, find and click on the icon below.
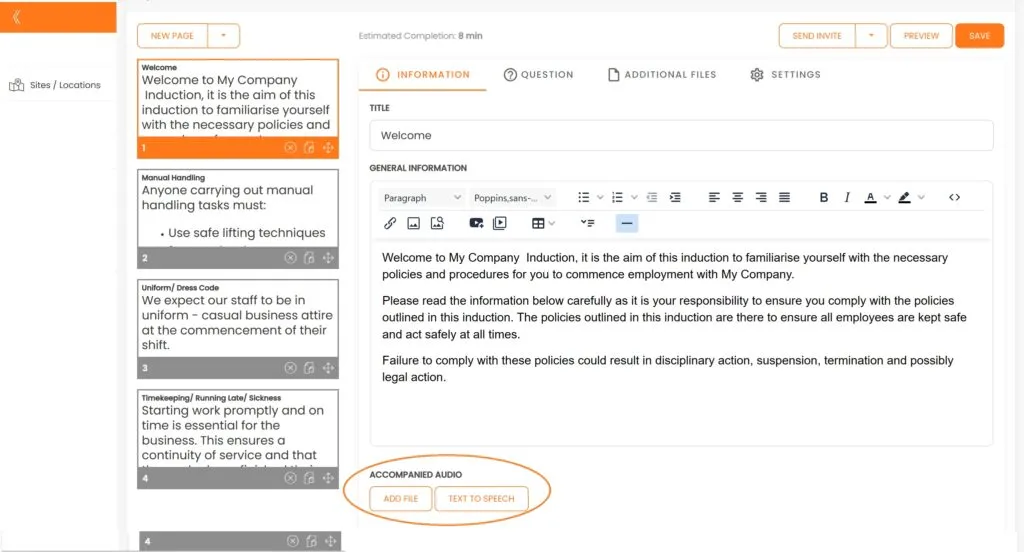
You are welcome to upload your own voiceover files to complement your induction slides. Click on ‘Add file’ to proceed with your upload.
Should you wish to utilize our Text to Speech built-in software for converting your text into a voiceover, please click on the ‘Text to Speech’ button. Be aware that the system cannot process text embedded within images. A fee of £2.5 applies for each file conversion. Customers with an Ultra Plus subscription can enjoy unlimited Text to Voice conversions at no cost.
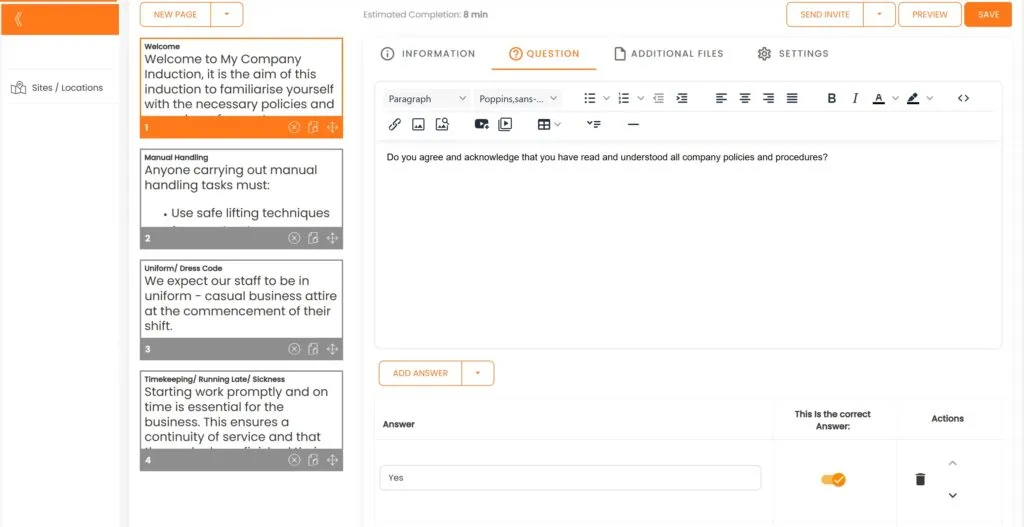
To create a quiz, click on the “(?)” Question field. Note that you can create one question per slide. Position your questions at the bottom of your induction slide, or opt to use a separate slide solely for your question. You can sequence multiple questions consecutively, or decide to quiz your users at the conclusion of their induction.
To add multiple-choice answers, click on ‘Add Answer’ and designate the correct answer(s). It is permissible to have multiple correct answers.
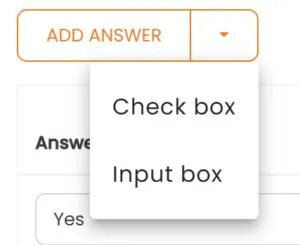
There are two types of answers:
Check Box – a standard answer option that can be marked as either Right or Wrong.
Input Box – allows users to type their answers; this type cannot be designated as Right or Wrong.
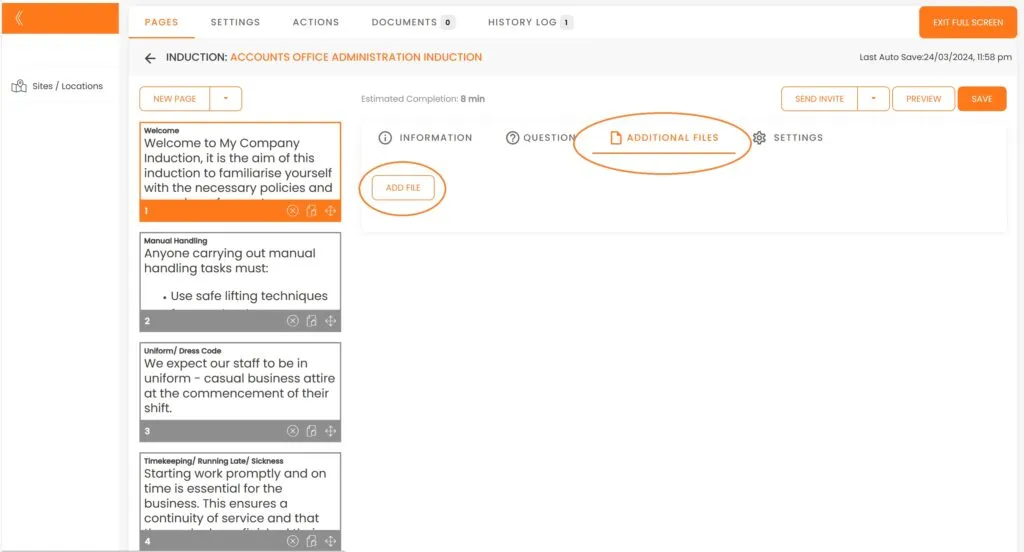
To add a PDF file to your slide, click on ‘Additional Files’ followed by ‘Add File’.
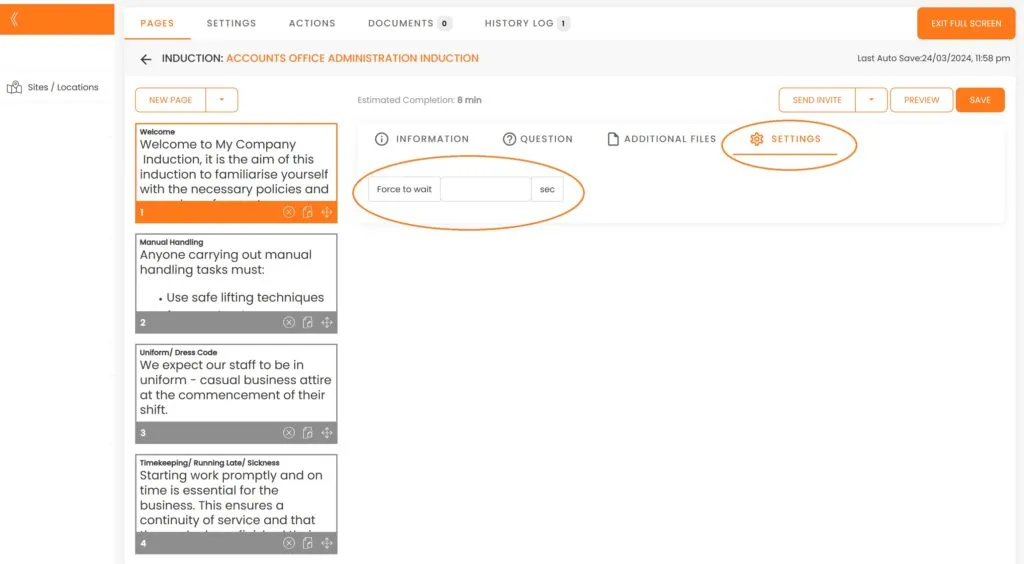
Each slide can be locked for a set duration, preventing users from advancing until the timer runs out. To activate this feature, click on ‘Settings’ and input the desired number of seconds in the ‘Force to Wait’ field. For reference, 1 minute equals 60 seconds.
This brings us to the end of this Training Session. Please continue to Session #5 to learn about Induction Course Settings. Thank you.