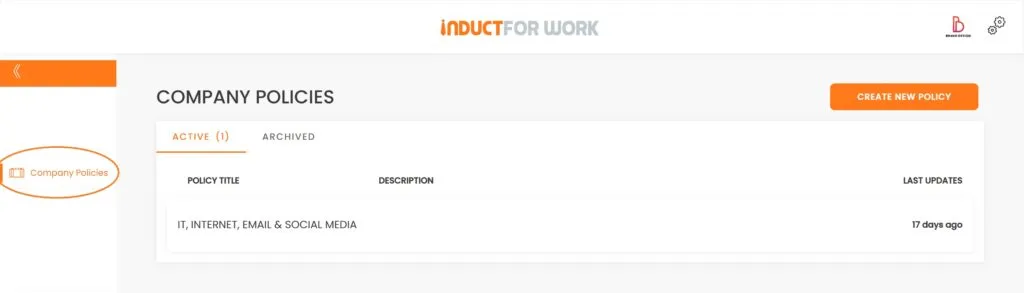
7. Company Policies
Most organizations should integrate their Company Policies and Safety Procedures into their induction courses. To access this, click on the ‘Company Policies’ tab located on your left.
There are several methods to distribute your Policies:
1. Allocate several slides in your induction presentation specifically for your Policies, ensuring that inductees have viewed these policies upon completion of their induction.
2. Develop separate company policies and require them as compulsory viewing during your inductions.
3. Upload your policies to the Documents and Signatures (add-on) section and have your inductees digitally sign them.
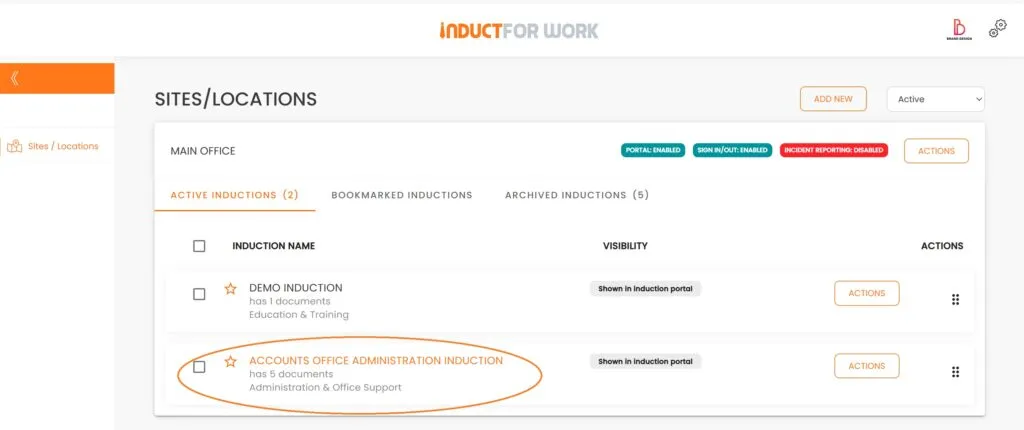
Let’s review all the options, beginning with option #1, which involves incorporating our Policies into Inductions. We’ll need to return to one of our Inductions and select it.
We will now insert a new page between slides 1 and 2.
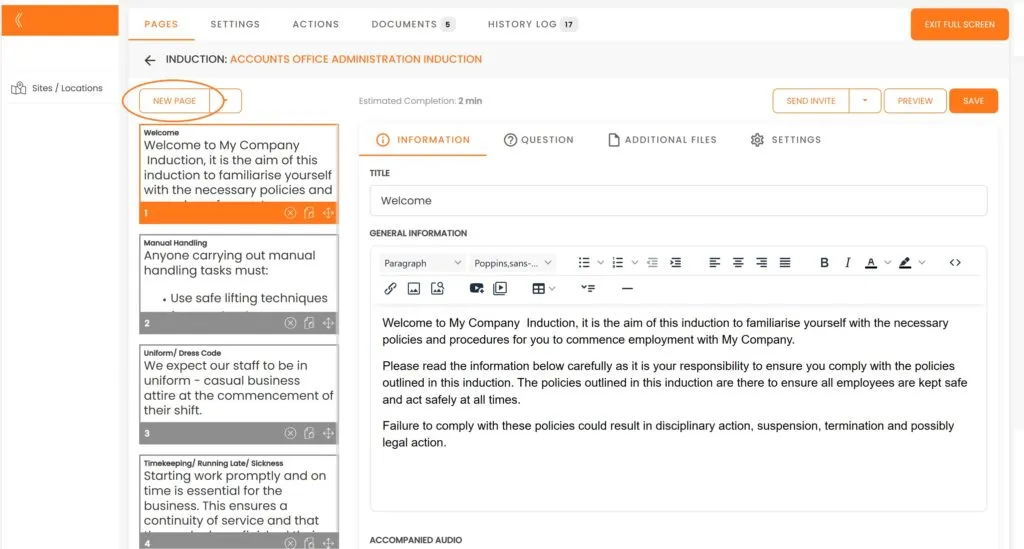
We will update the Title and then input our Policy information into the General Information section. Click ‘Save’.

Pros and Cons:
Pros: Setting up and updating is straightforward when managing a single induction; no additional functions are necessary.
Cons: Gets harder to update and keep track of information changes if same policies are embedded into multiple inductions and across multiple sites.
Option #2 involves attaching policies to inductions.
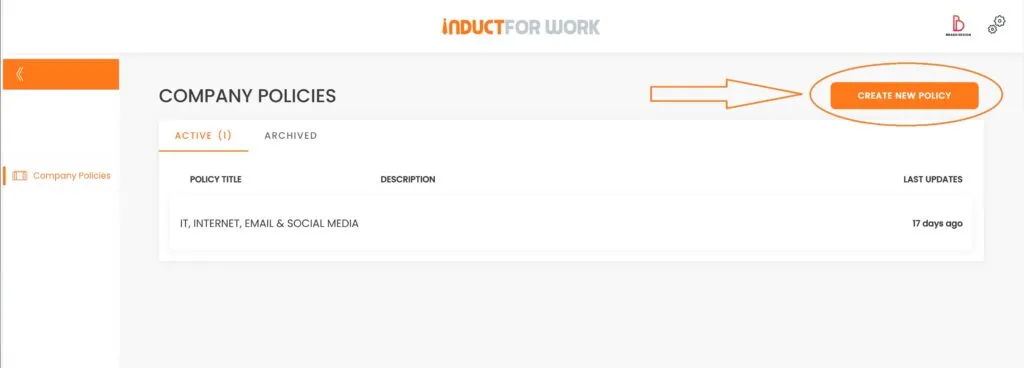
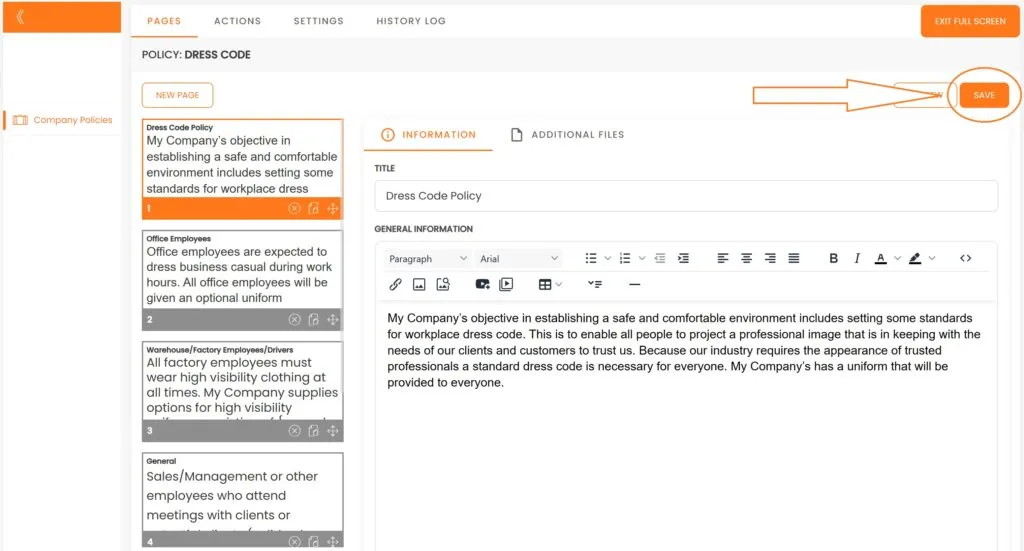
For this step, we will navigate to ‘Company Policies’ to create a new policy.
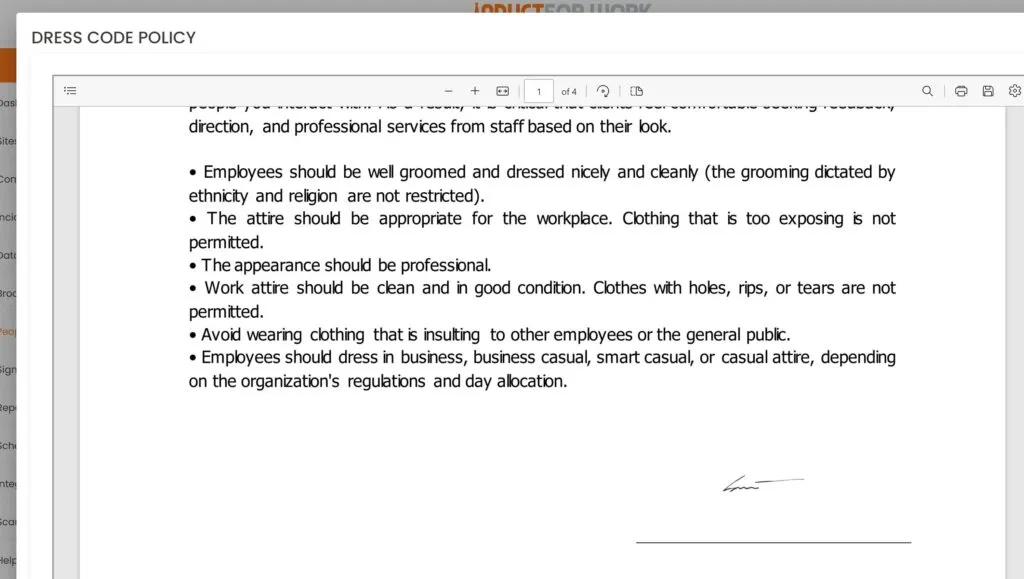
We will create a new policy by utilizing a ‘Dress Code’ sample and then click ‘Save’.

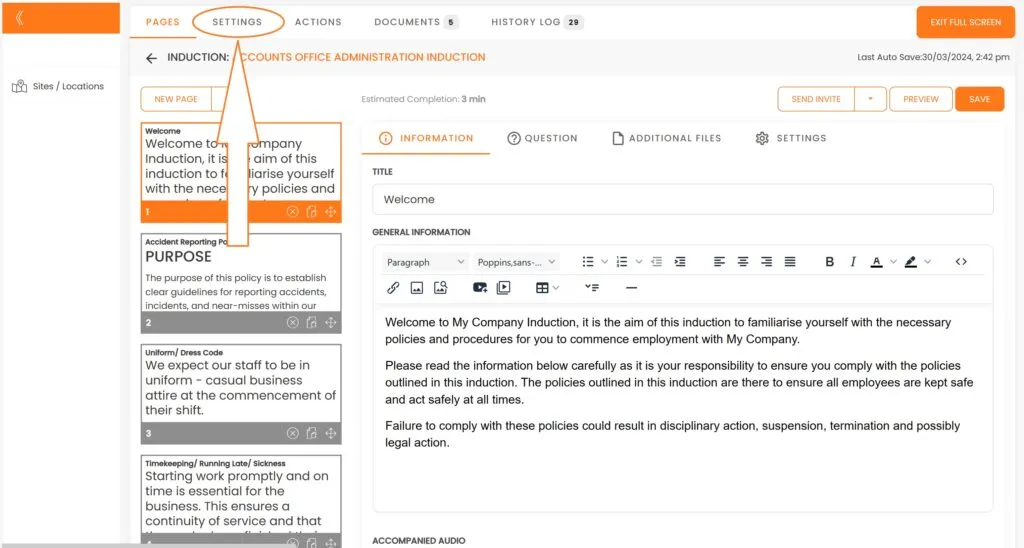
Now, let’s return to our Induction and select the Settings option.
Next, we will click on ‘Force to View Policies’, choose ‘Dress Code’ from the options, and then click ‘Save’.
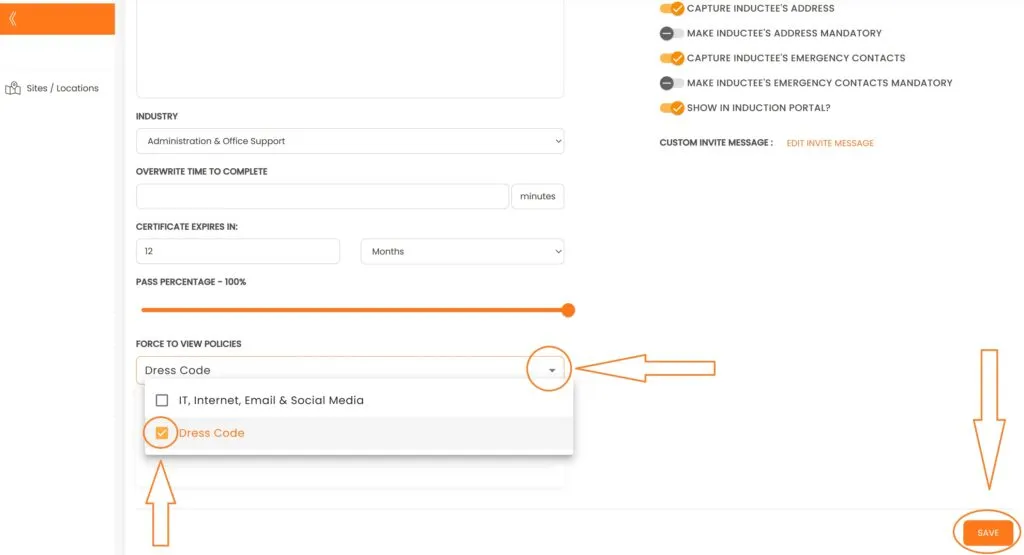
Moving forward, all participants in the ‘Accounts Office Induction’ will be required to review the company’s ‘Dress Code’ policy. Here is how it will appear to your users.

Pros and Cons:
Pros: The setup and update process is straightforward, whether for a single induction or multiple ones, without the need for additional functions.
Cons: None
Option #3: Attaching Policies to Documents and Signatures.
This option is most effective when you need to obtain user signatures as evidence of their participation in your induction/onboarding process.
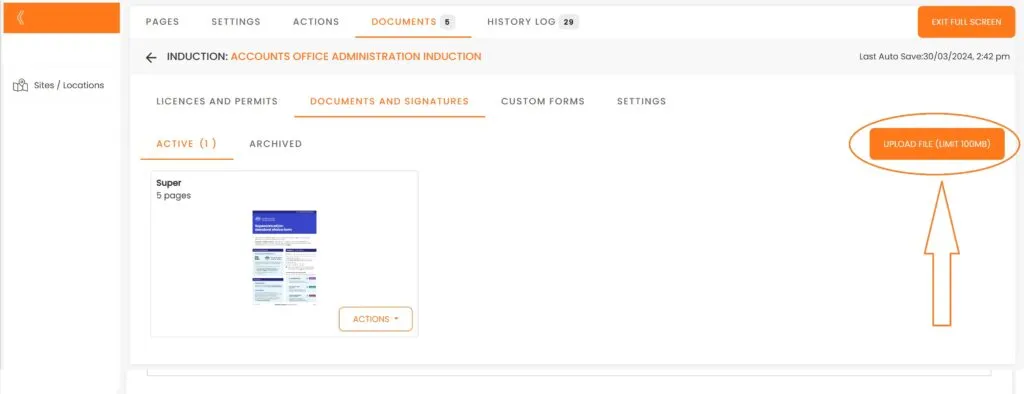
First, ensure that your policies are available in PDF format. Then, proceed to your Induction and select ‘Documents’.
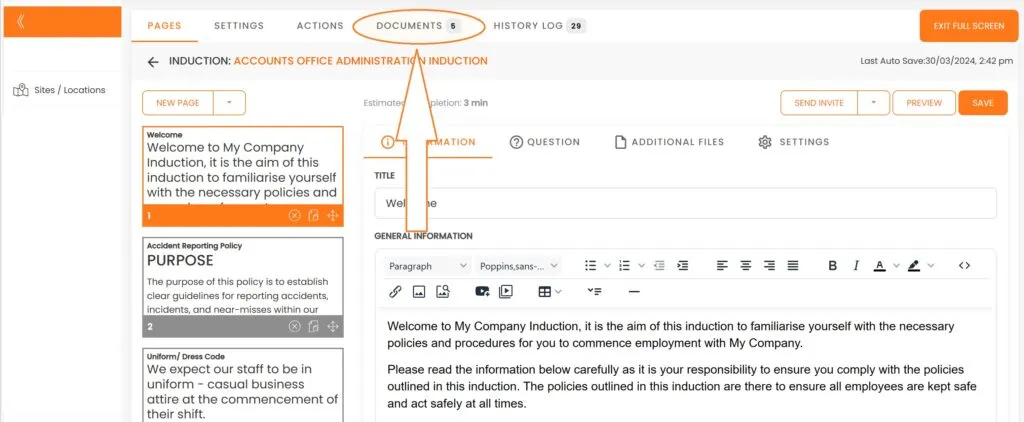
From here we go to ‘Documents and Signatures’.

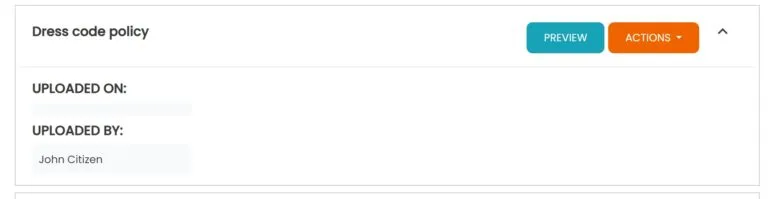
We continue by clicking ‘Upload File’. Size limits apply.
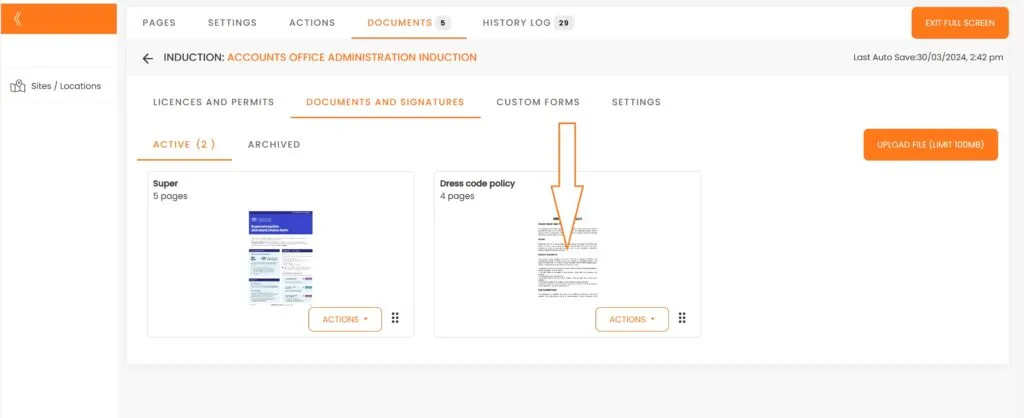
We upload our PDF Dress Code Policy and then click on it.
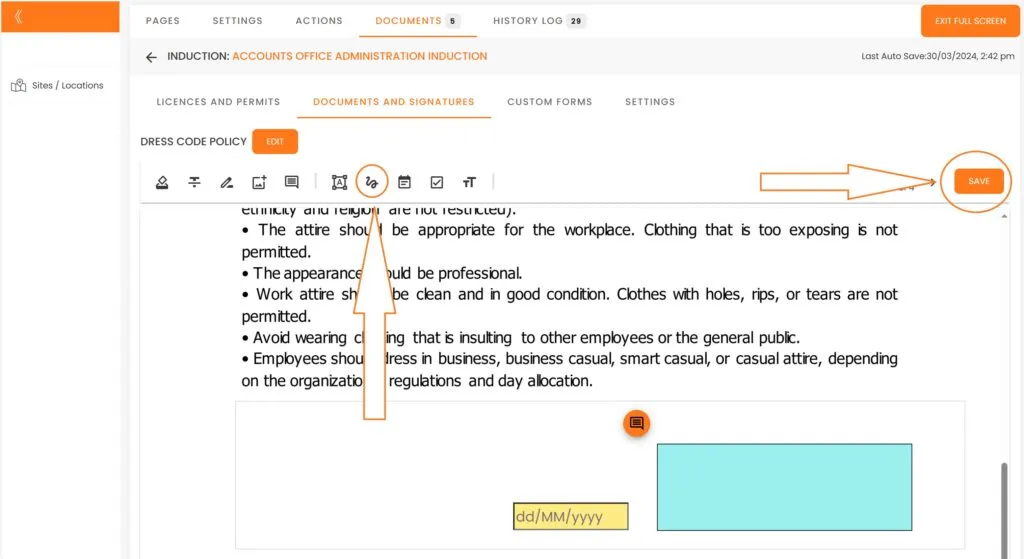
Select the ‘Add Signature’ option, place it in the desired location, and then click ‘Save’.
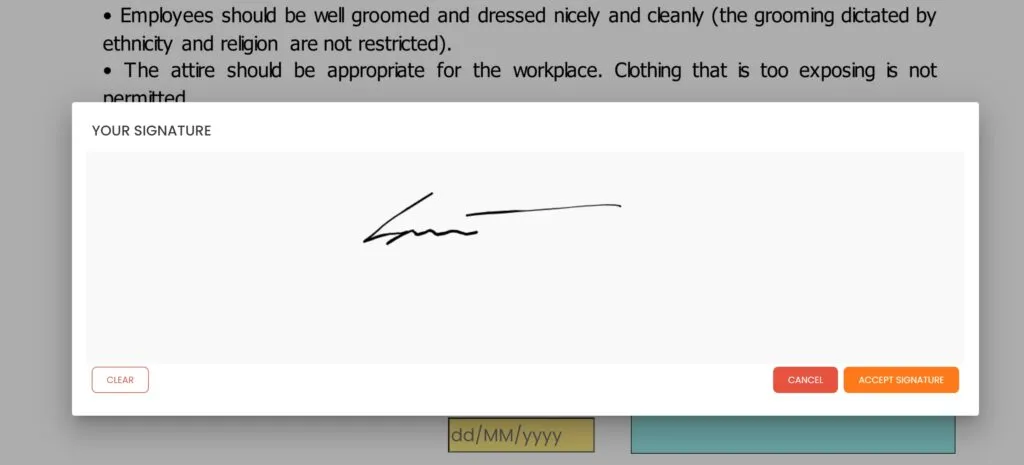
Upon completion of their inductions, users will be prompted to complete the ‘Dress Code Policy’ form.

Upon completion, you will be able to preview and download the document from your user profile.
You can integrate your account with over 6,000 other applications and automatically transfer all captured documents to your Dropbox, OneDrive, Google Drive, Microsoft Office, and many other apps. Account integration will be covered in our upcoming sessions.
Pros and Cons:
Pros: Captures and stores digital signatures on actual documents, allows uploading of pre-employment forms, and eliminates unnecessary data handling when integrated.
Cons: Requires an add on (£50 per month), plus some experience using the system to set it up.
This brings us to the end of this Training Session. Please continue to Session #8 to learn about Induction Portals. Thank you.